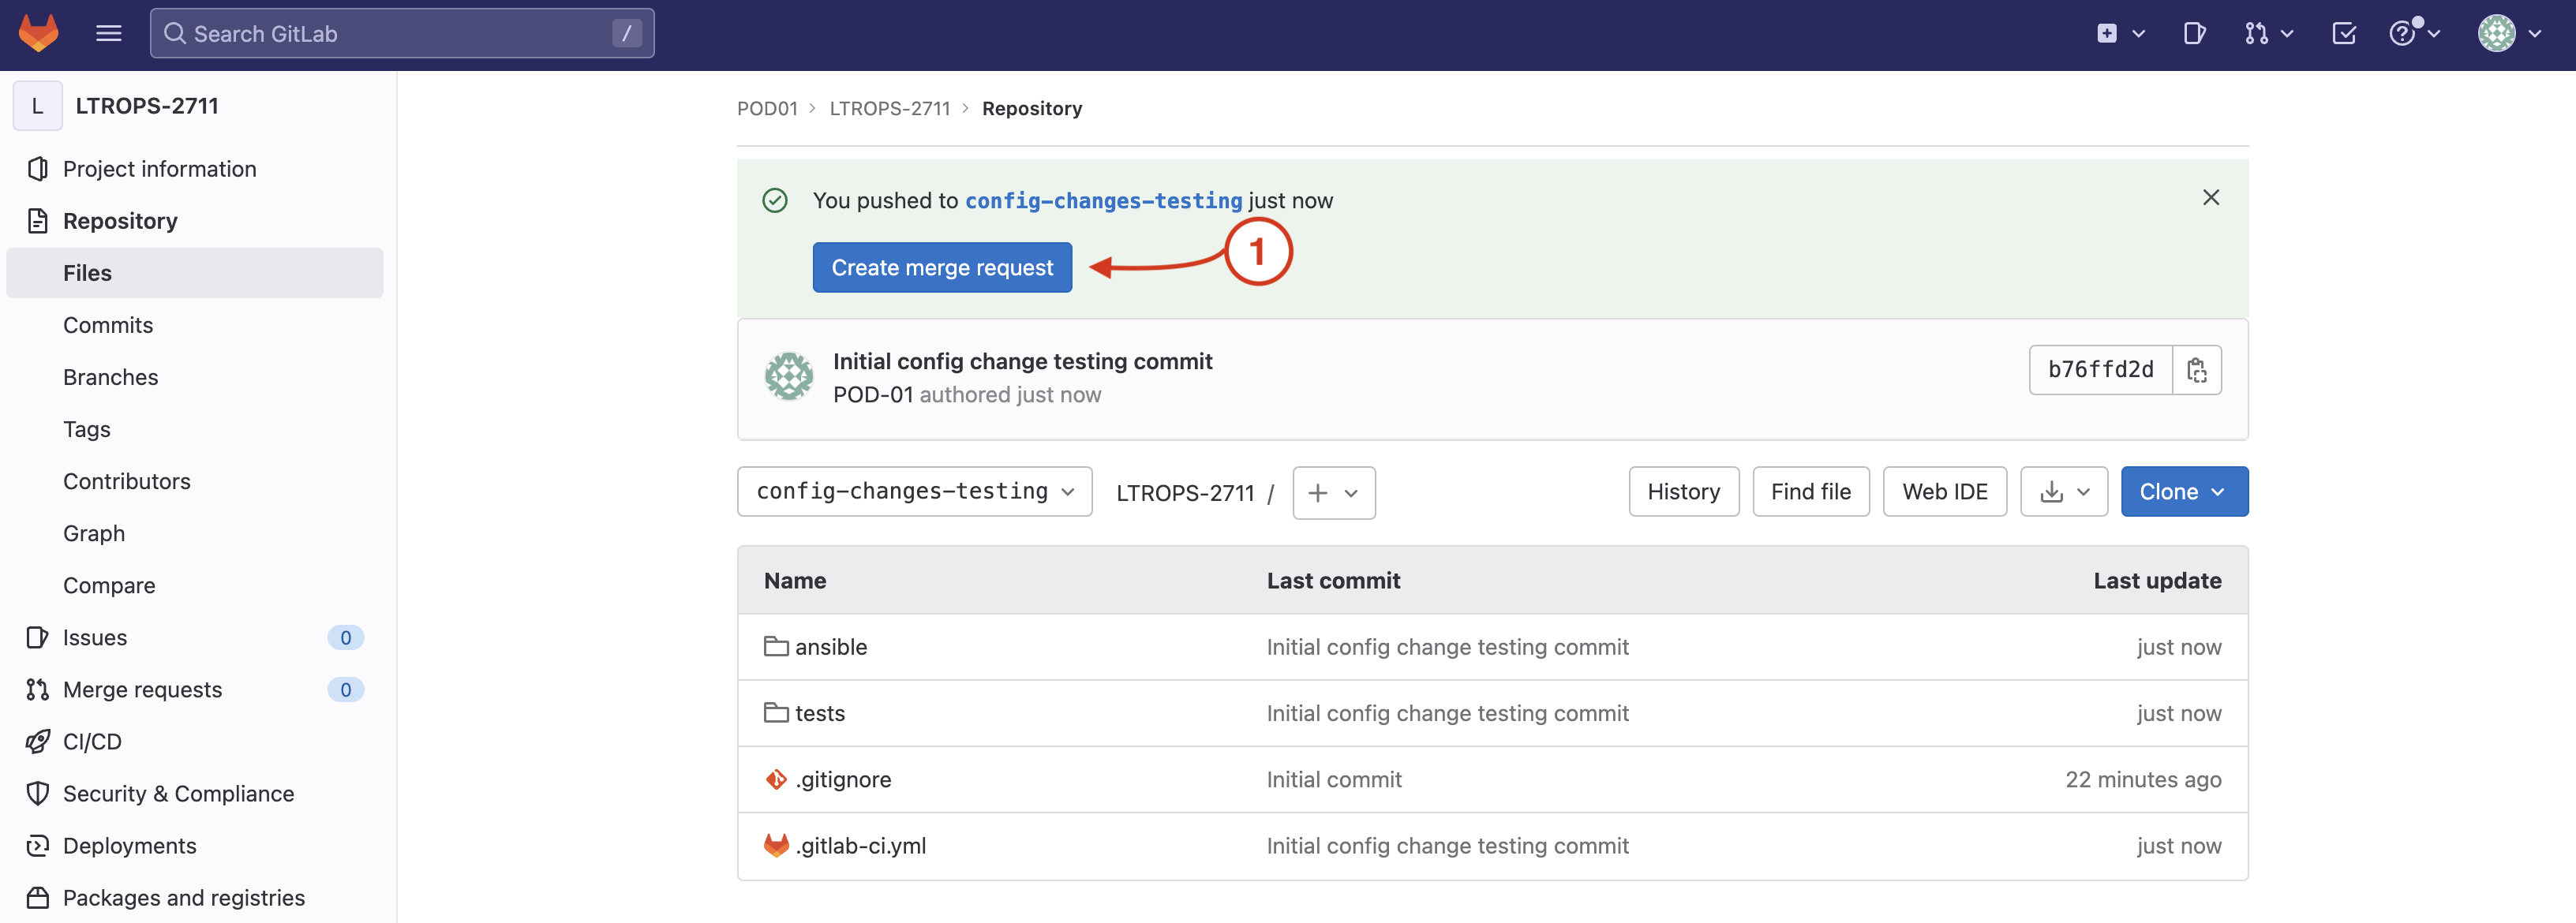
With your infrastructure as code, and tests along with your pipeline file present in your Git repo config change branch, the next step you need to take is to create a merge request. Merge request is the terminology used by GitLab and is equivalent to GitHub's Pull Request terminology. This is the step in the process where the developer opens a "ticket" for the change to the code base, i.e. main branch, they wish to make. Upon opening this ticket request, Continuous Integration (CI) occurs where the build and test steps execute. In the paradigm of NetDevOps with CI, the build and deploy phase is the configuration of the test network and the testing is the linting steps and pre-/post- network test steps.
From your GitLab project page:
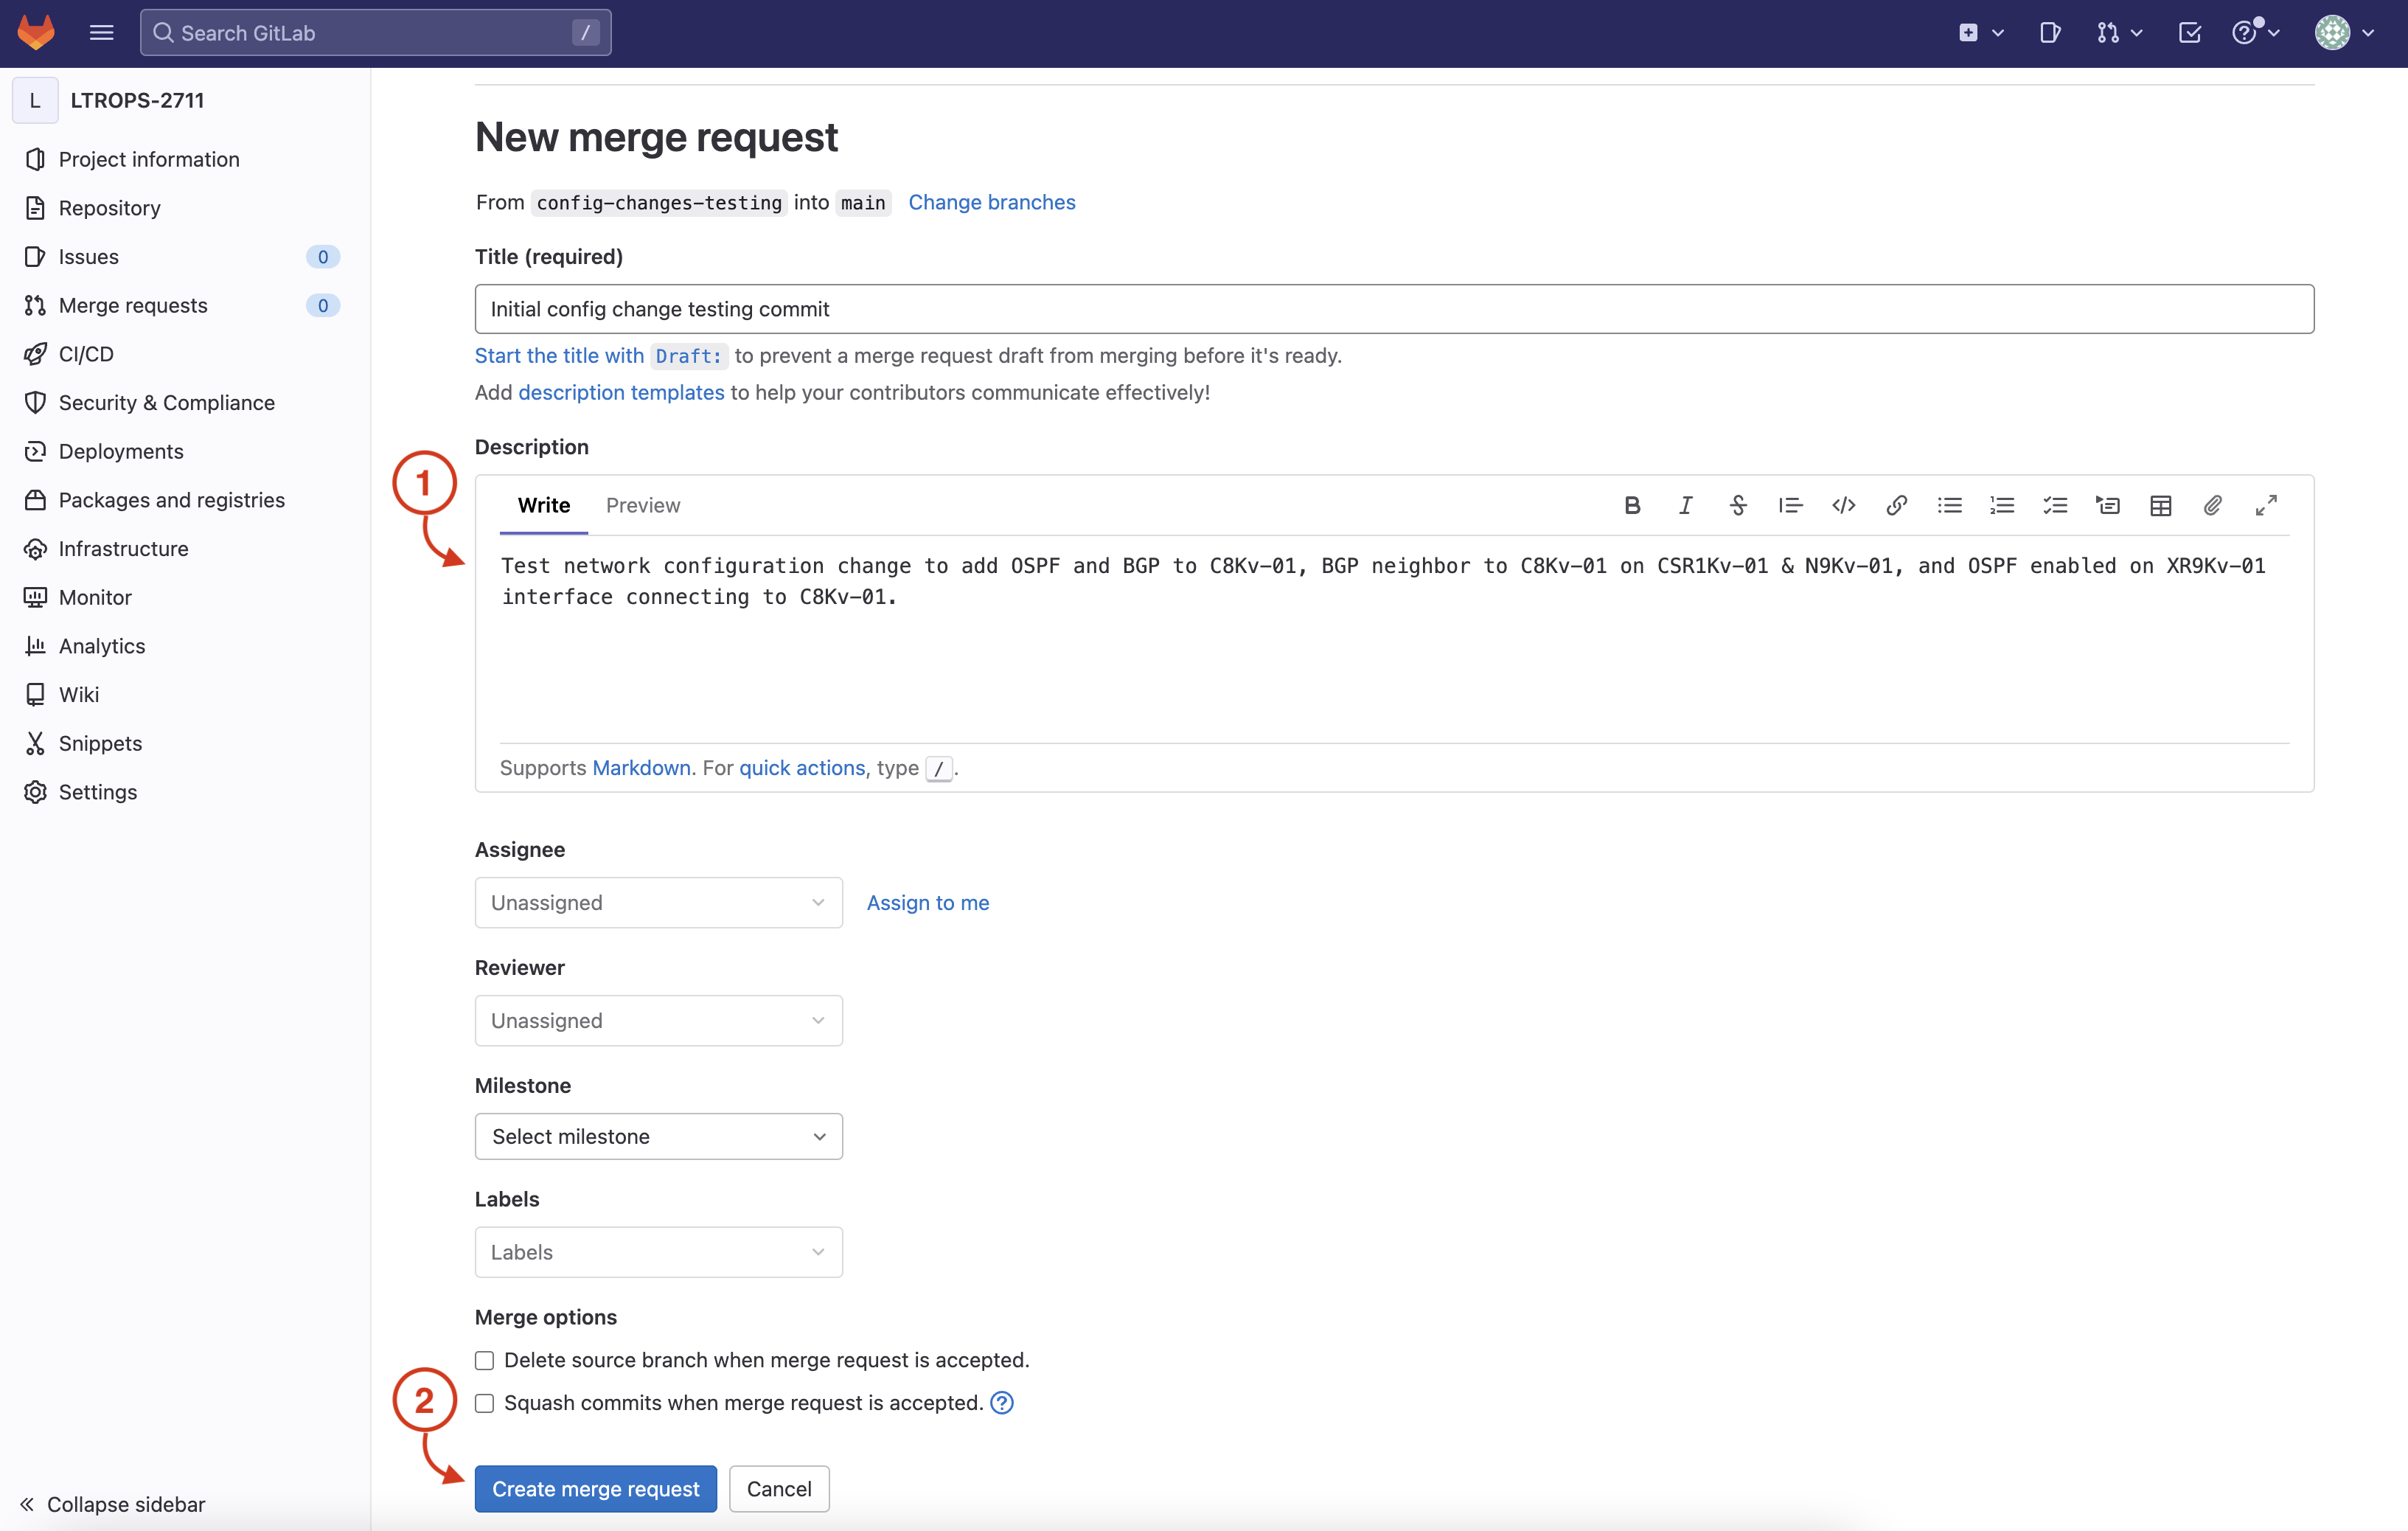
In the Merge Request perform the following:
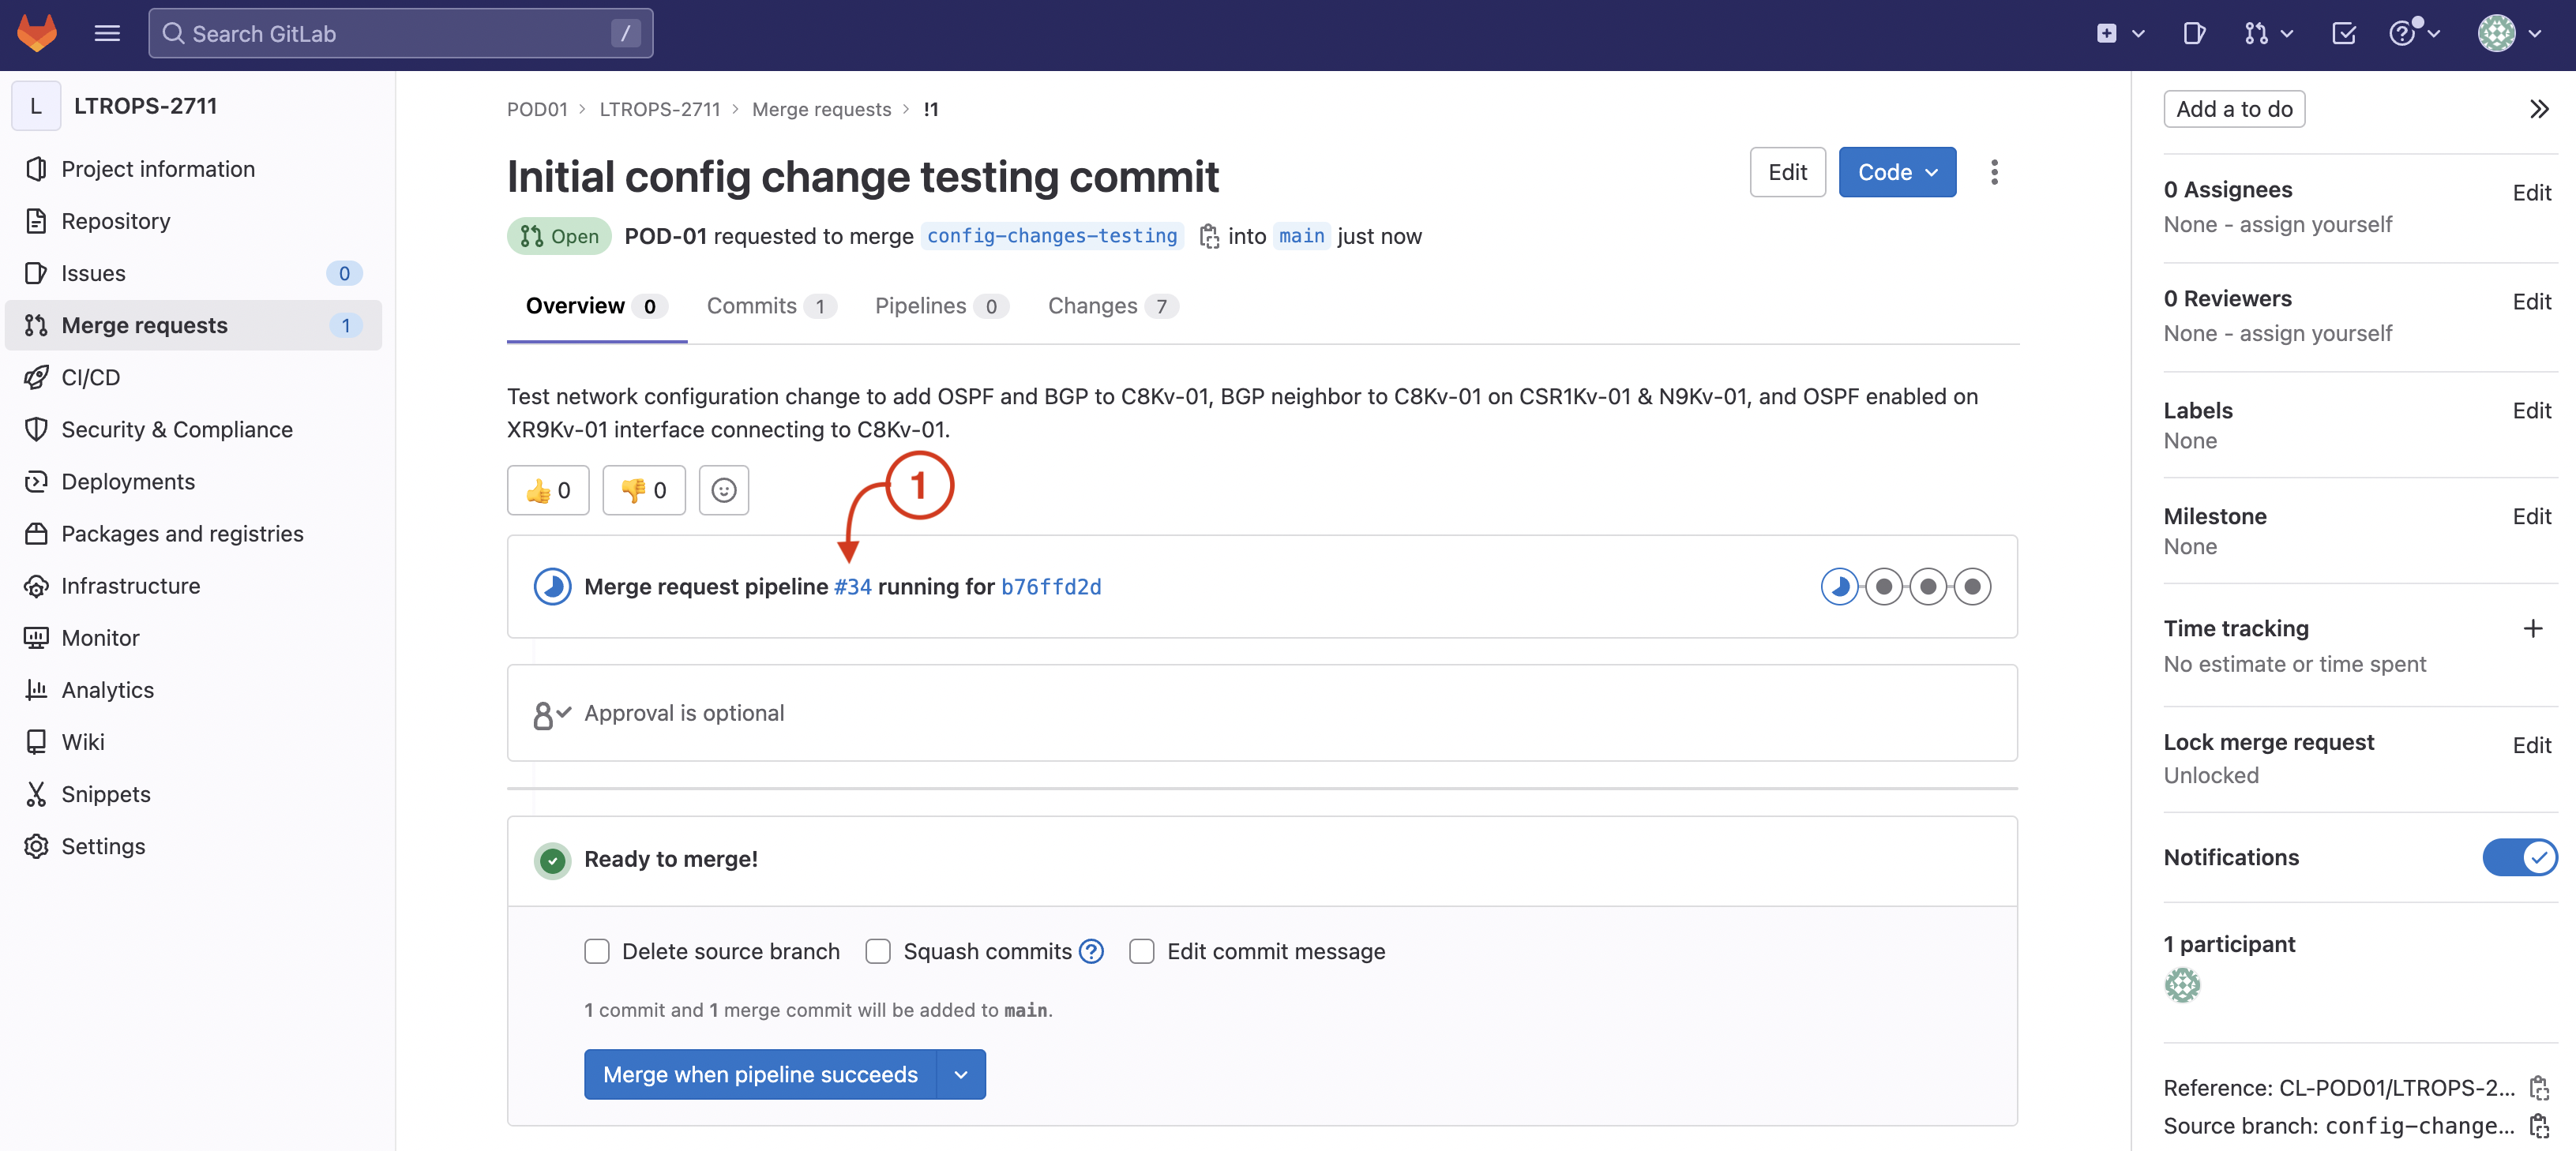
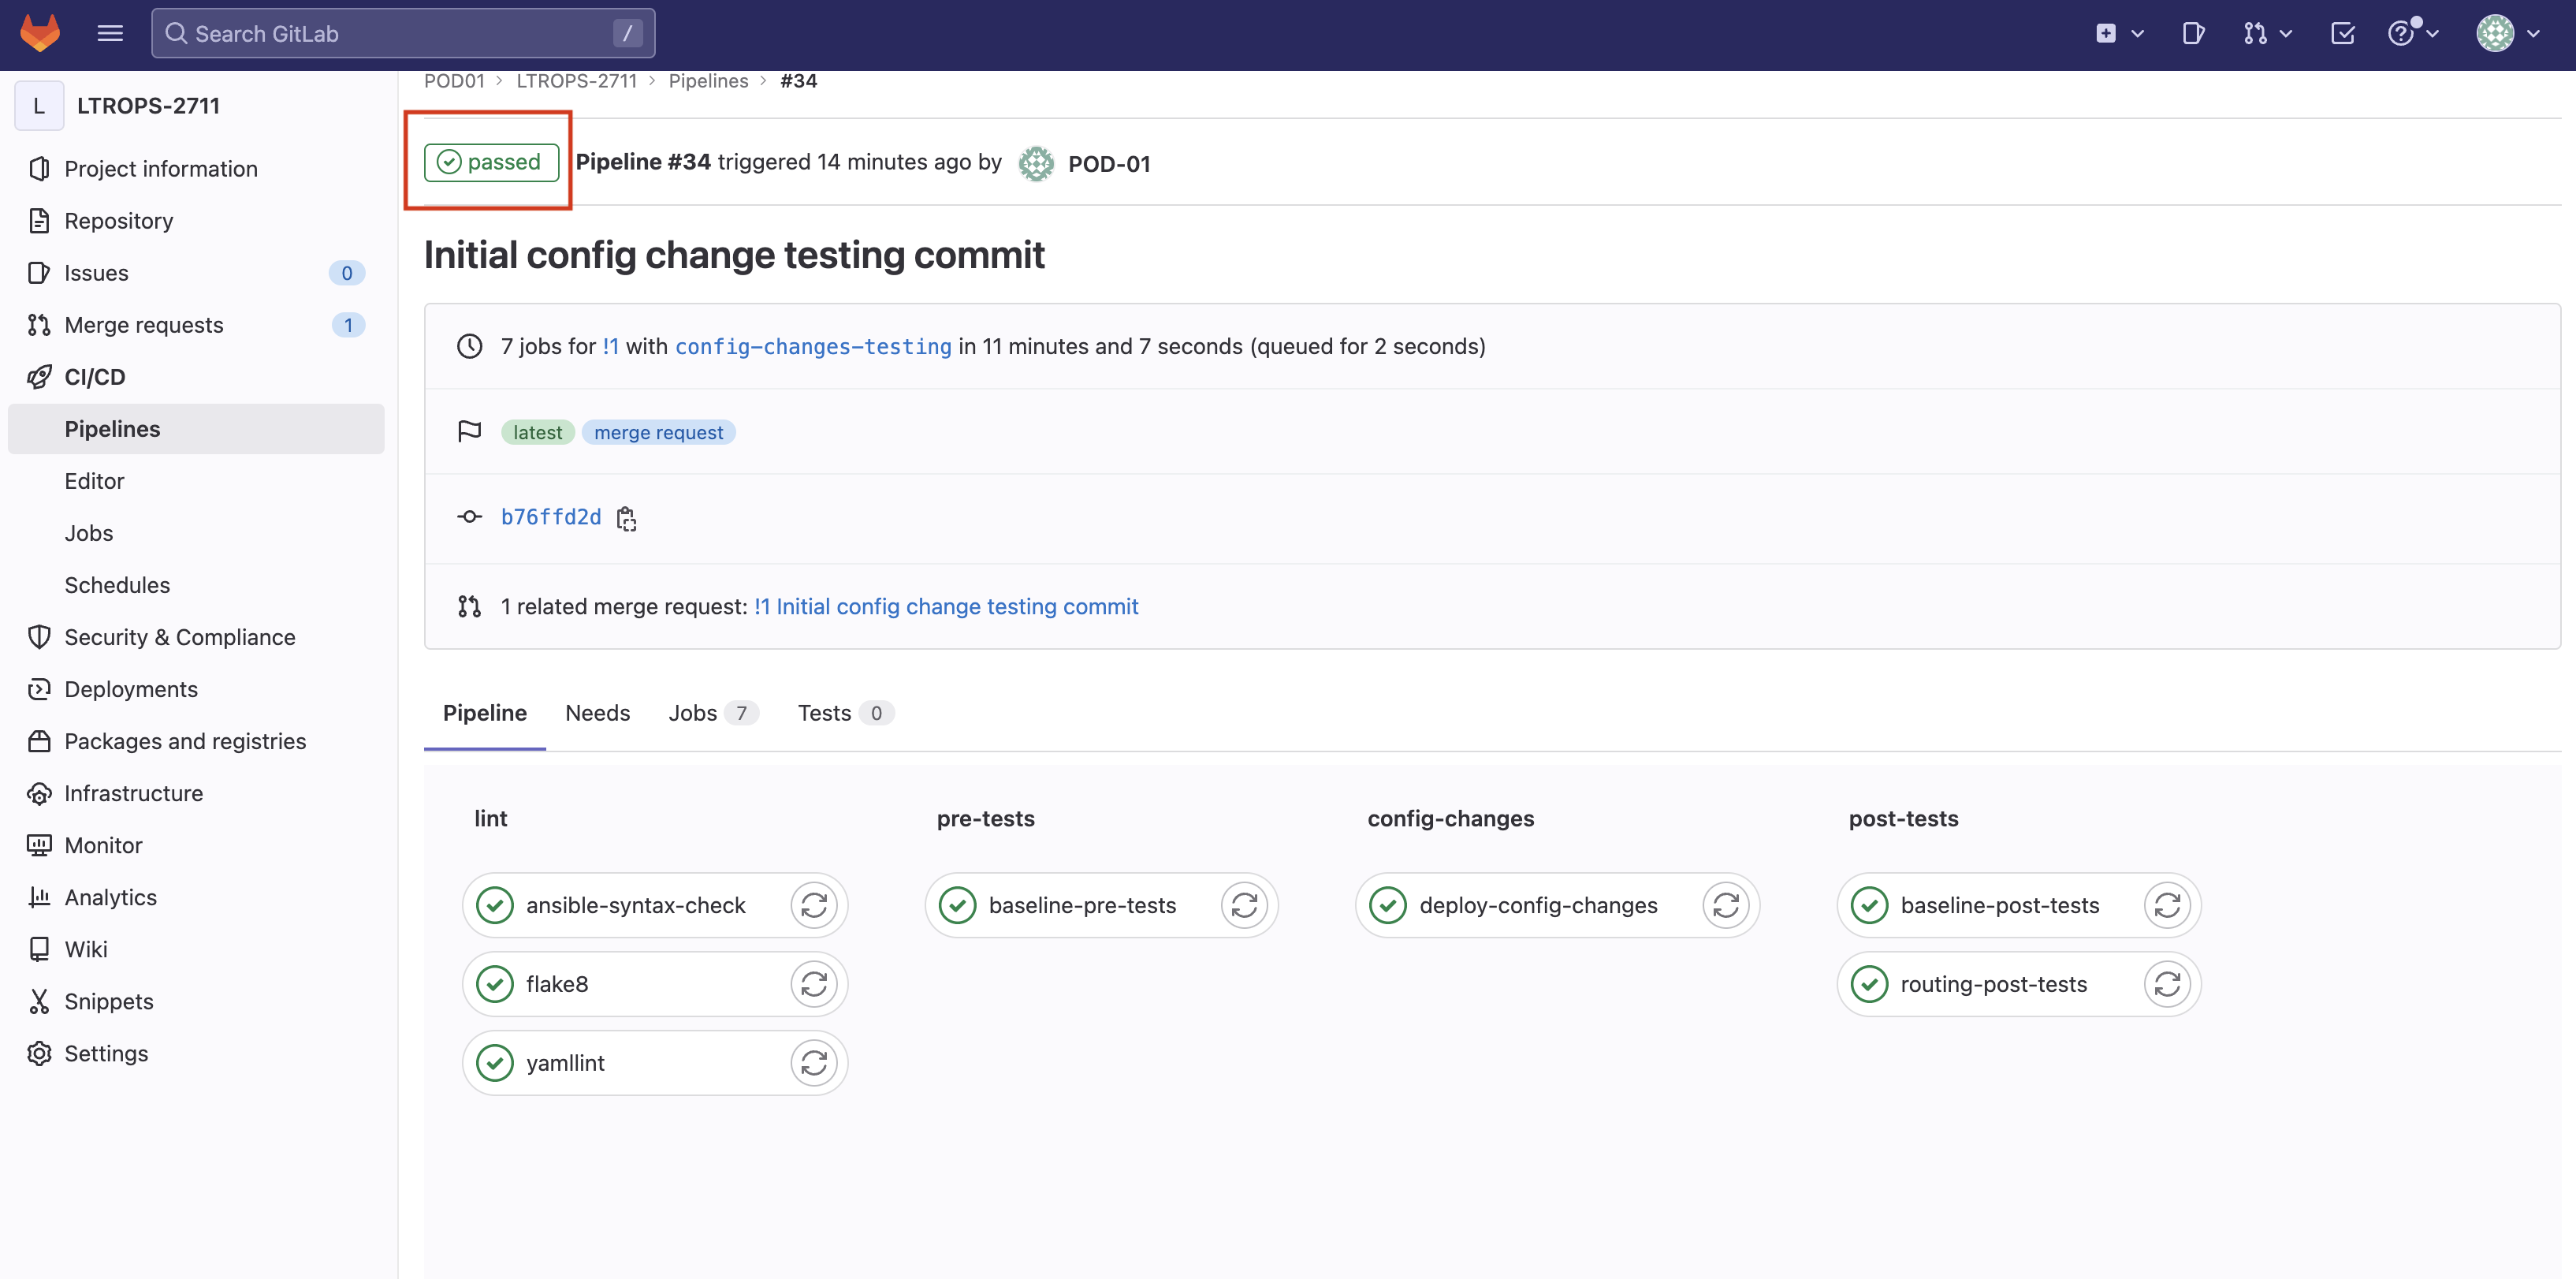
Navigate to the pipeline that was launched when you opened your Merge Request:
Review the graphical representation of your overall pipeine that you defined in your .gitlab-ci.yml file:
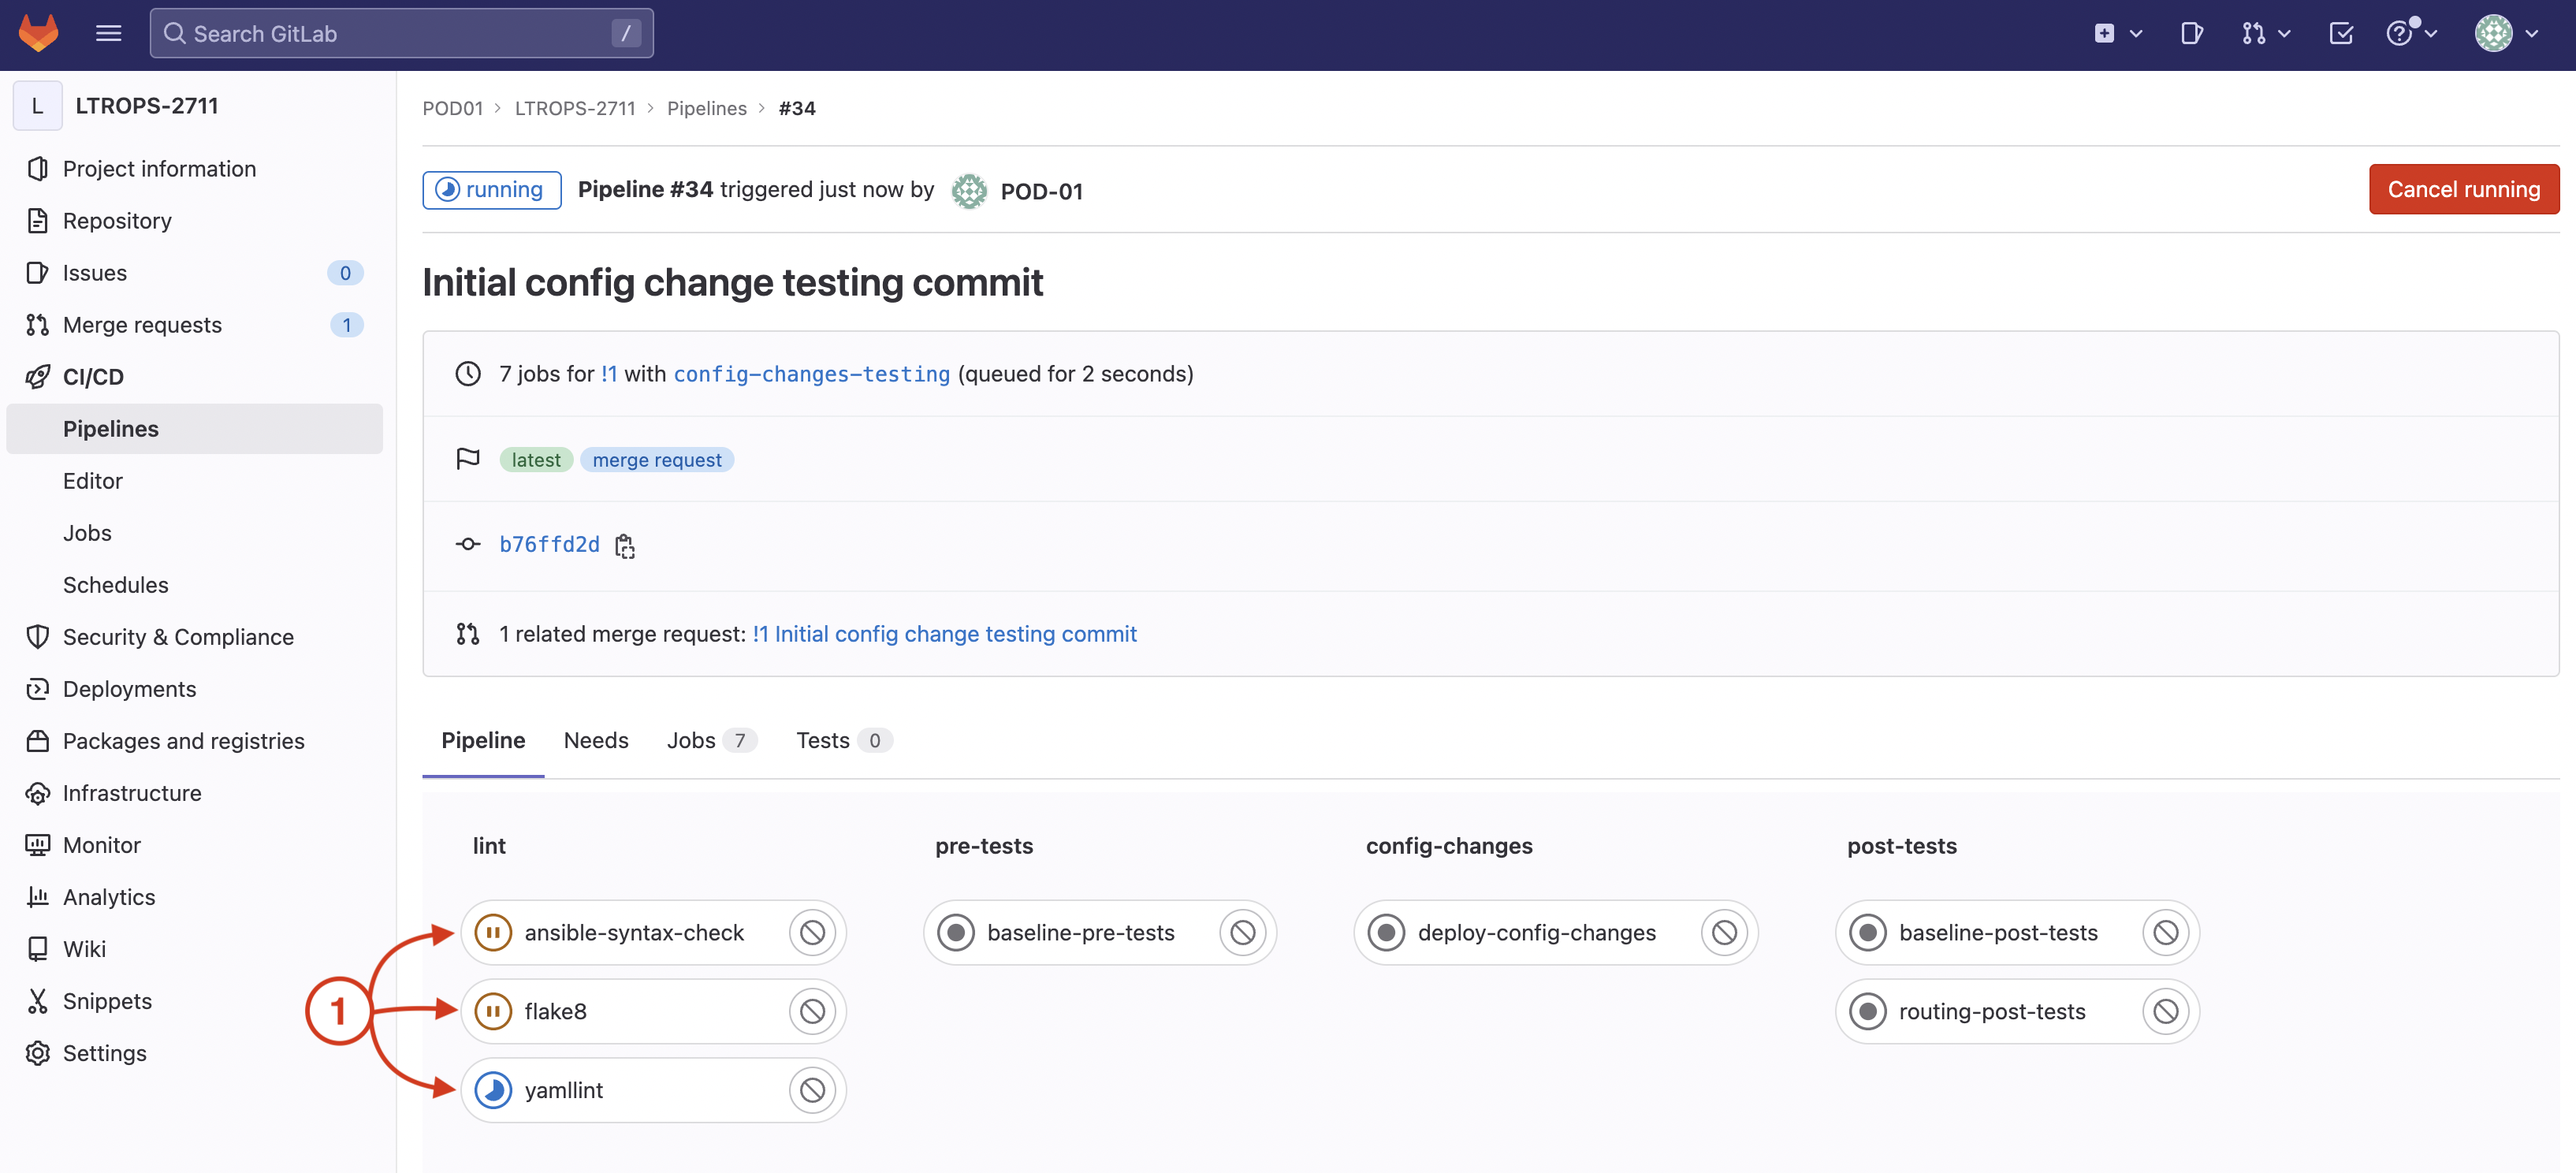
After all the steps in your lint stage have completed, your pre-tests stage will start.
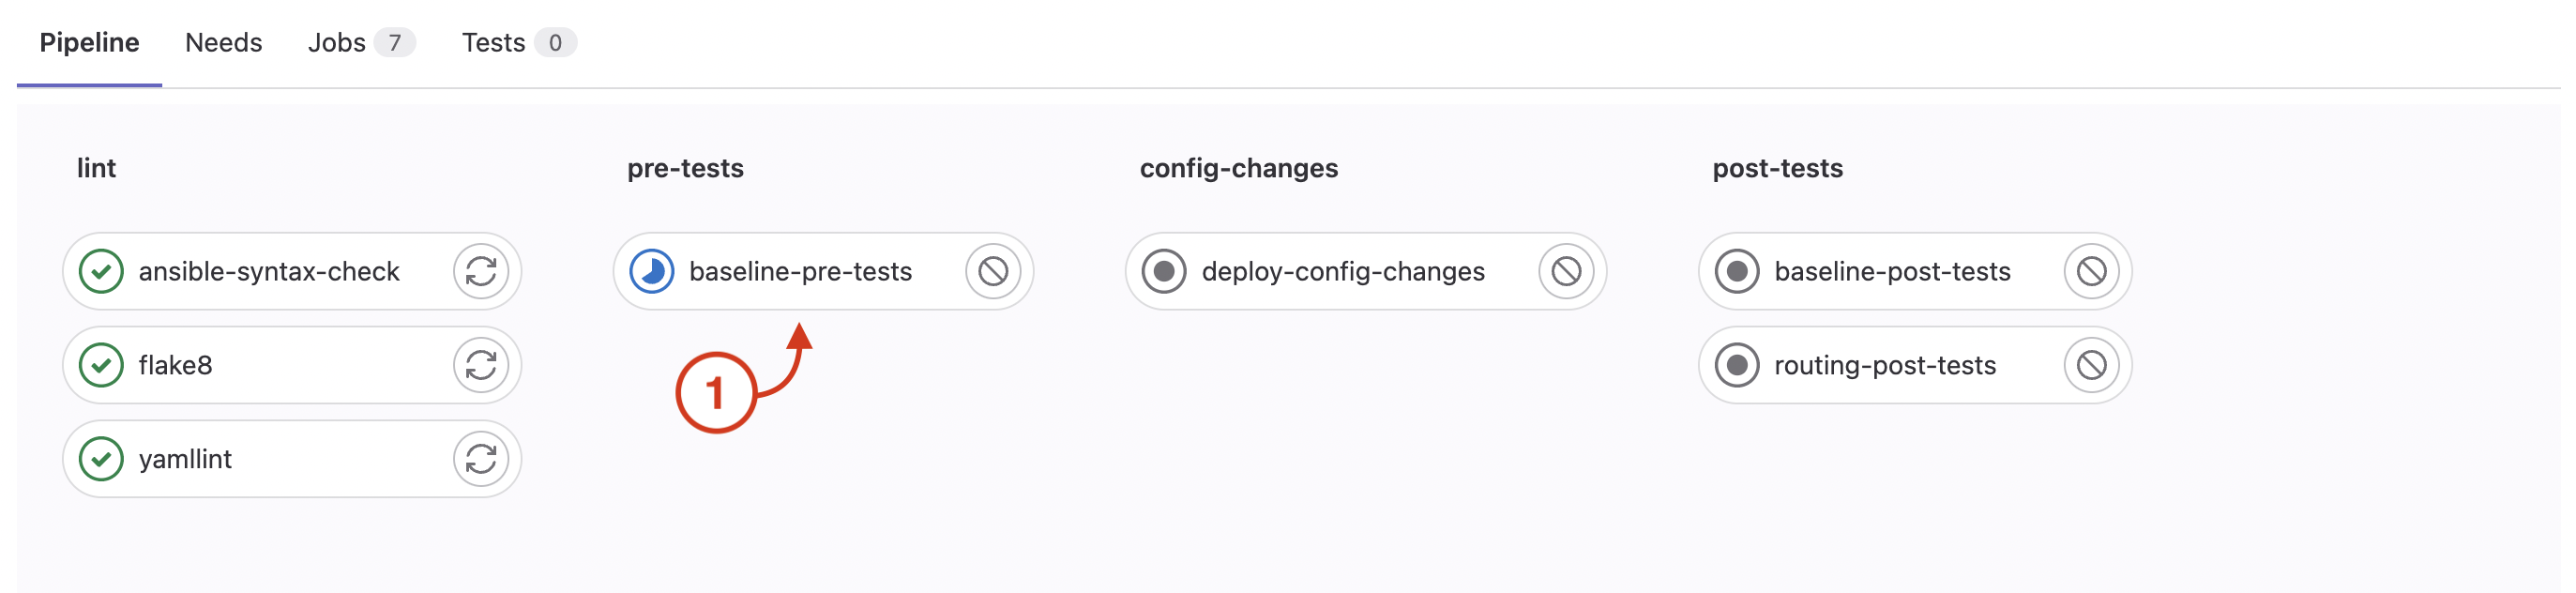
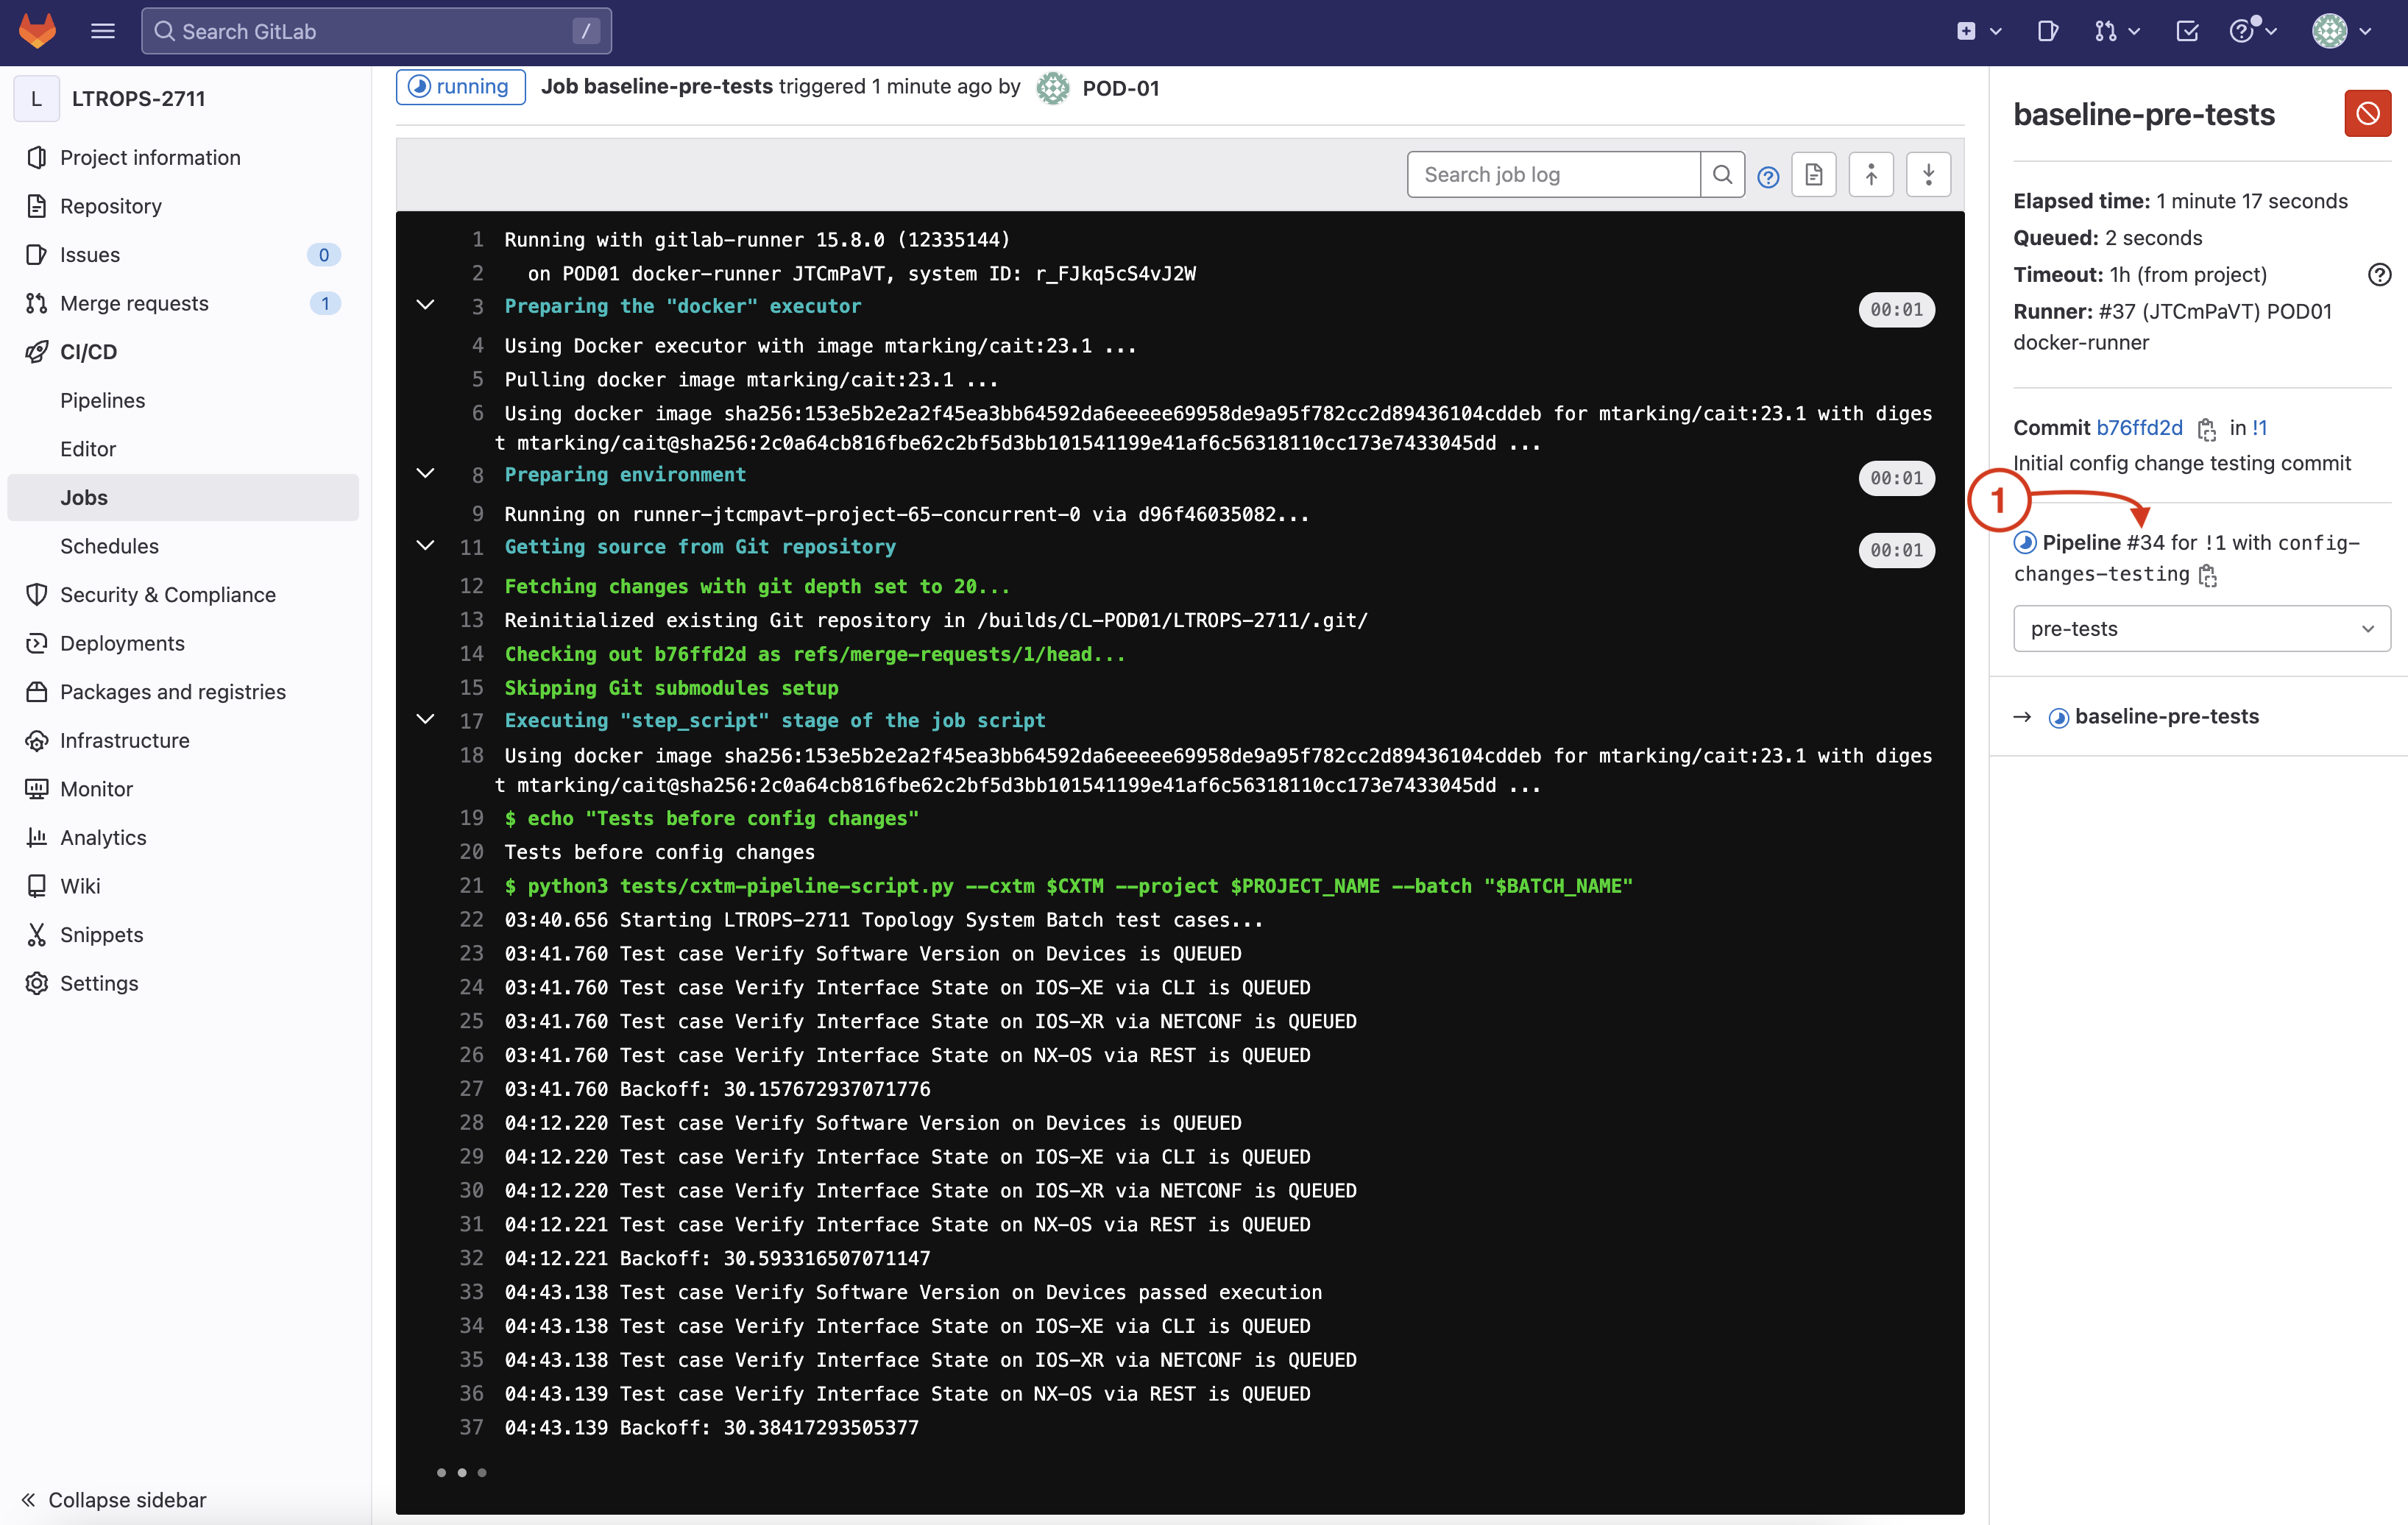
This will bring you to the job running your baseline-pre-tests that is using your CXTM API script to drive the execution of your first batch you created earlier in the lab within CXTM. The test cases in the batch are expected to pass, thus the pipeline step stage will pass, however, if one of the batch test cases fails, then the pipeline would fail.
After the completion of your pre-tests stage:
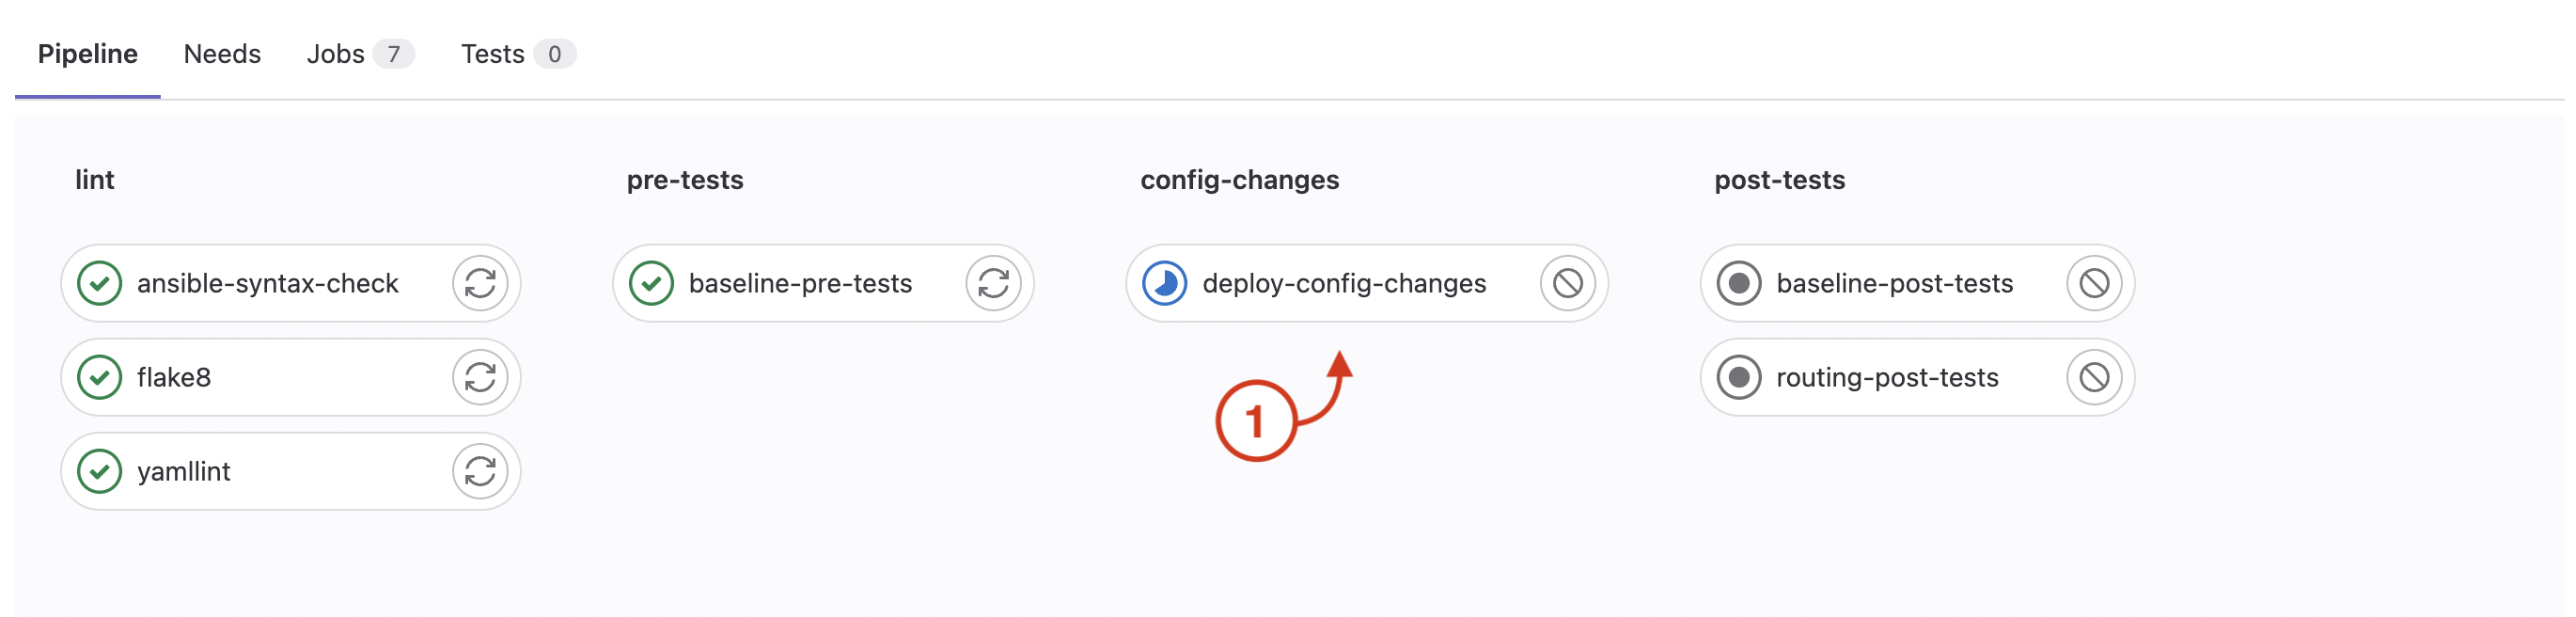
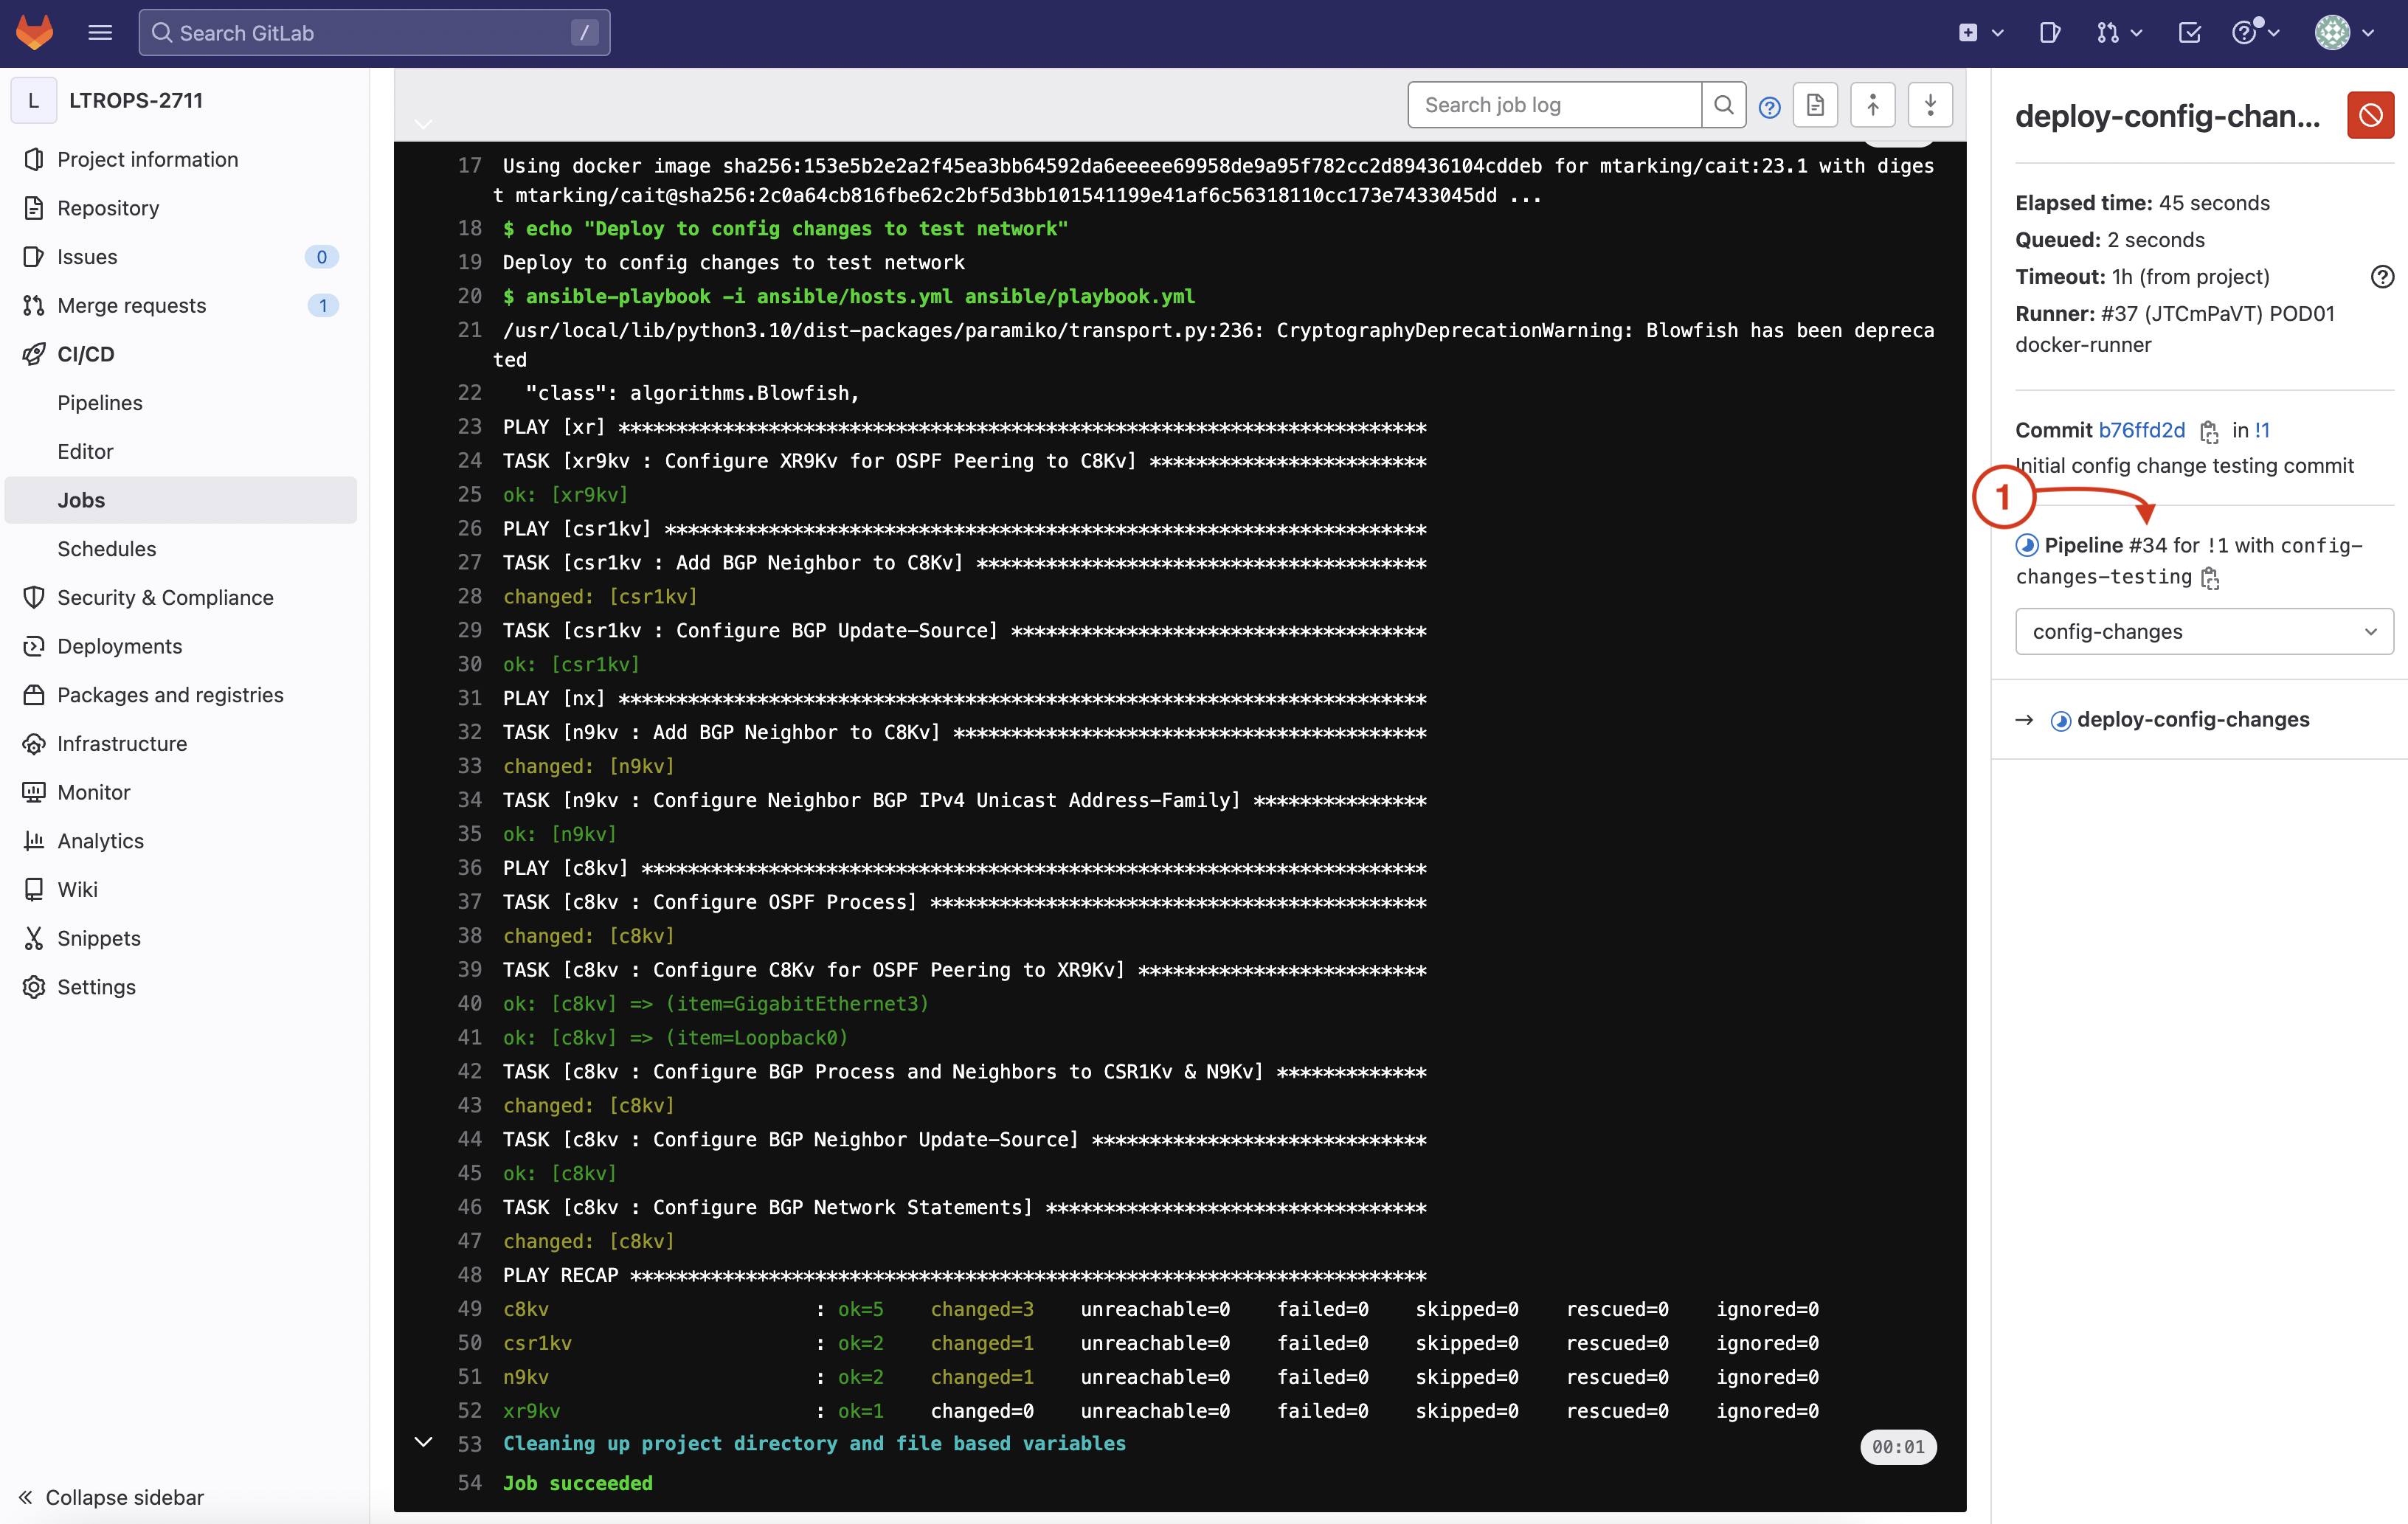
Review the running configuration changes job that is using your IaC Ansible playbook to modify the test network configuration. The playbook is expected to pass, but any failures would also result in the pipeline failing.
After the config-changes stage has completed, your post-tests stage will start.
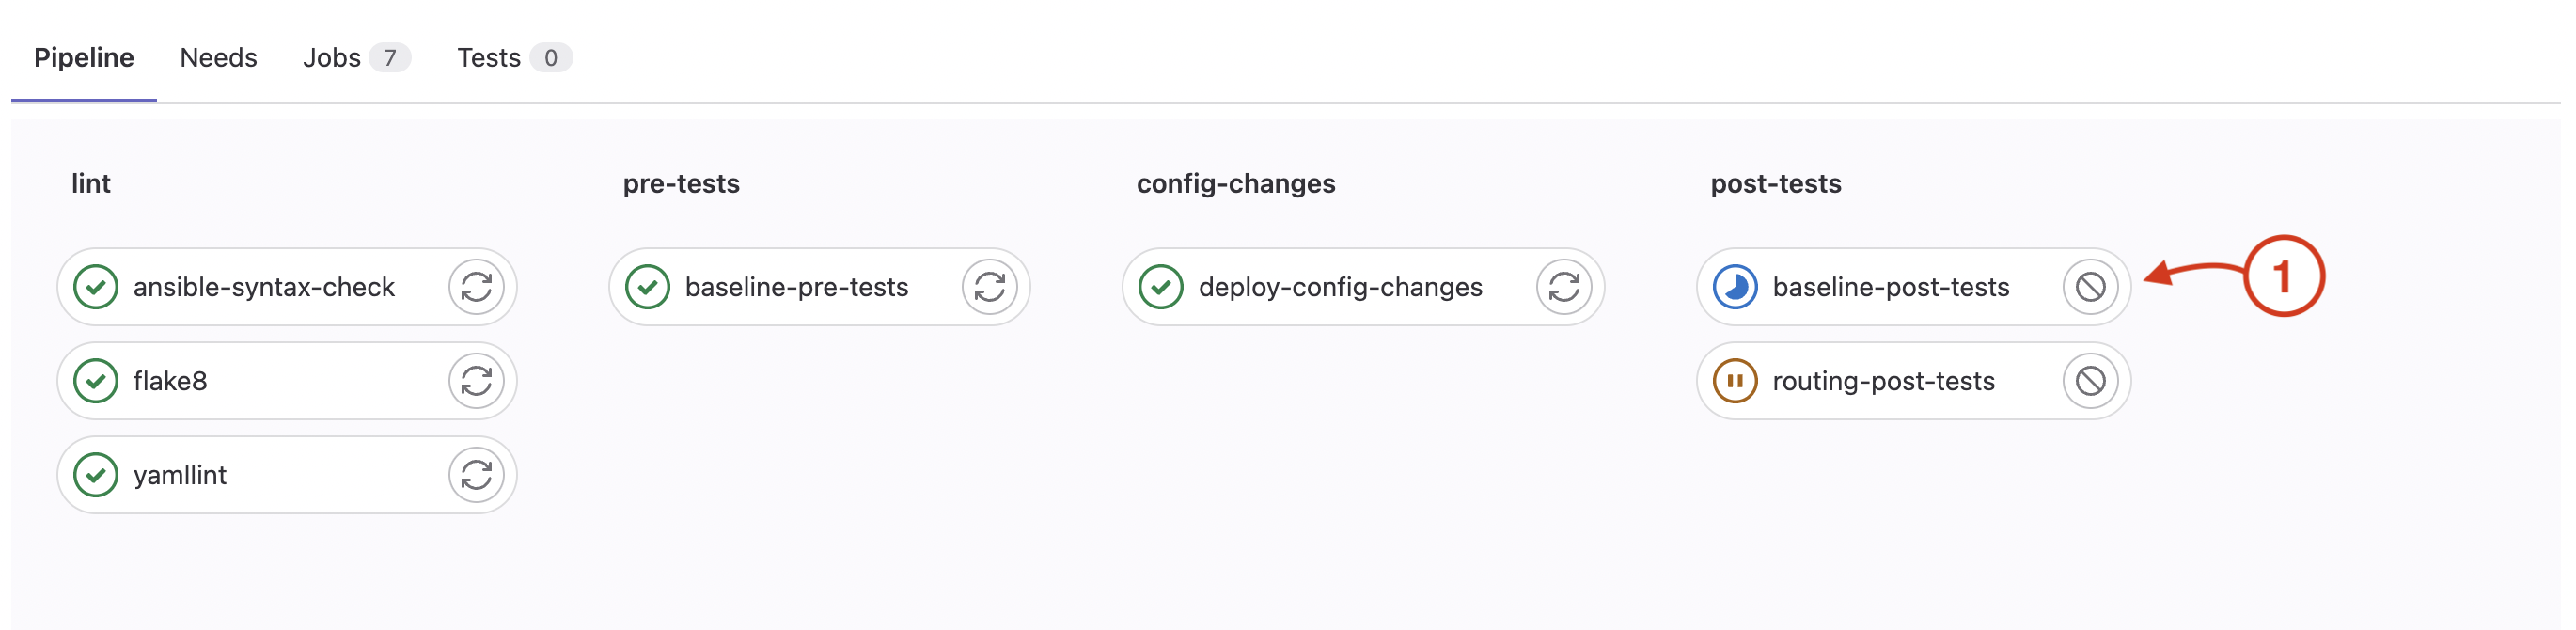
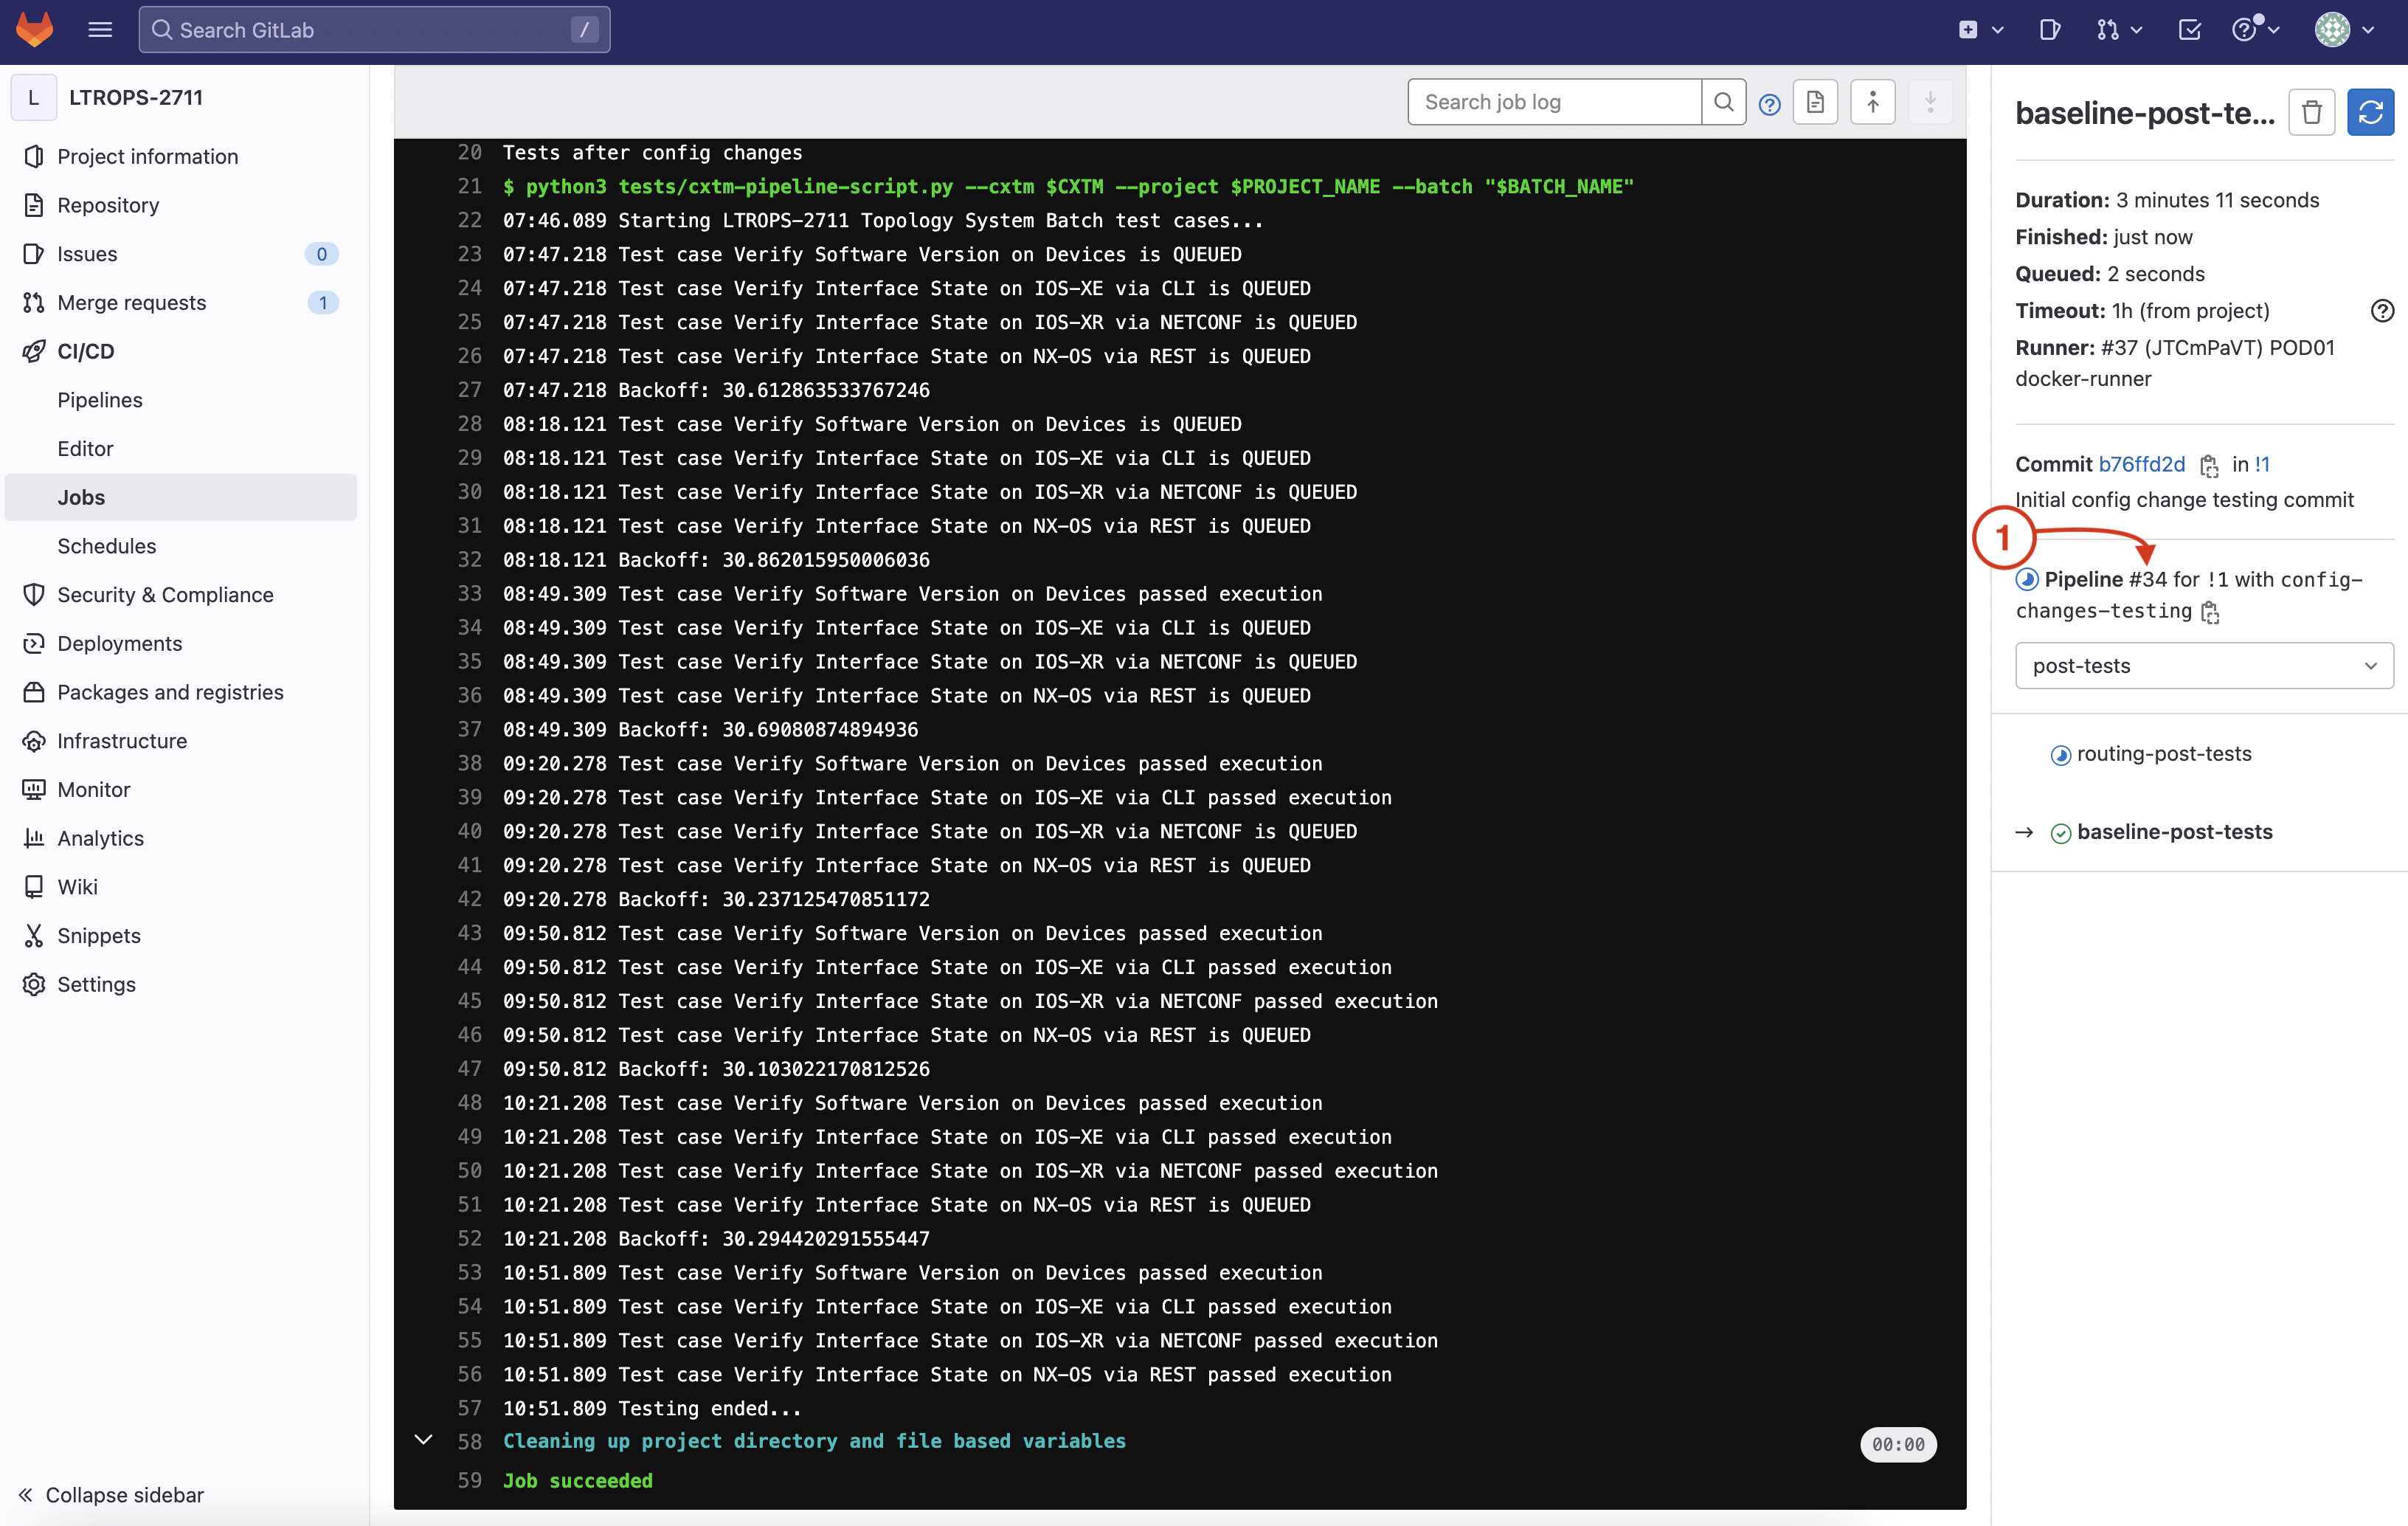
This will bring you to the job running your baseline-post-tests that is using your CXTM API script to drive the same execution of your first batch you ran in the pre-tests stage. The test cases in the batch are expected to pass, thus the pipeline step stage will pass, however, if one of the batch test cases fails, then the pipeline would fail.
After the baseline-post-tests step has completed, your routing-post-tests step will start in your post-tests stage.
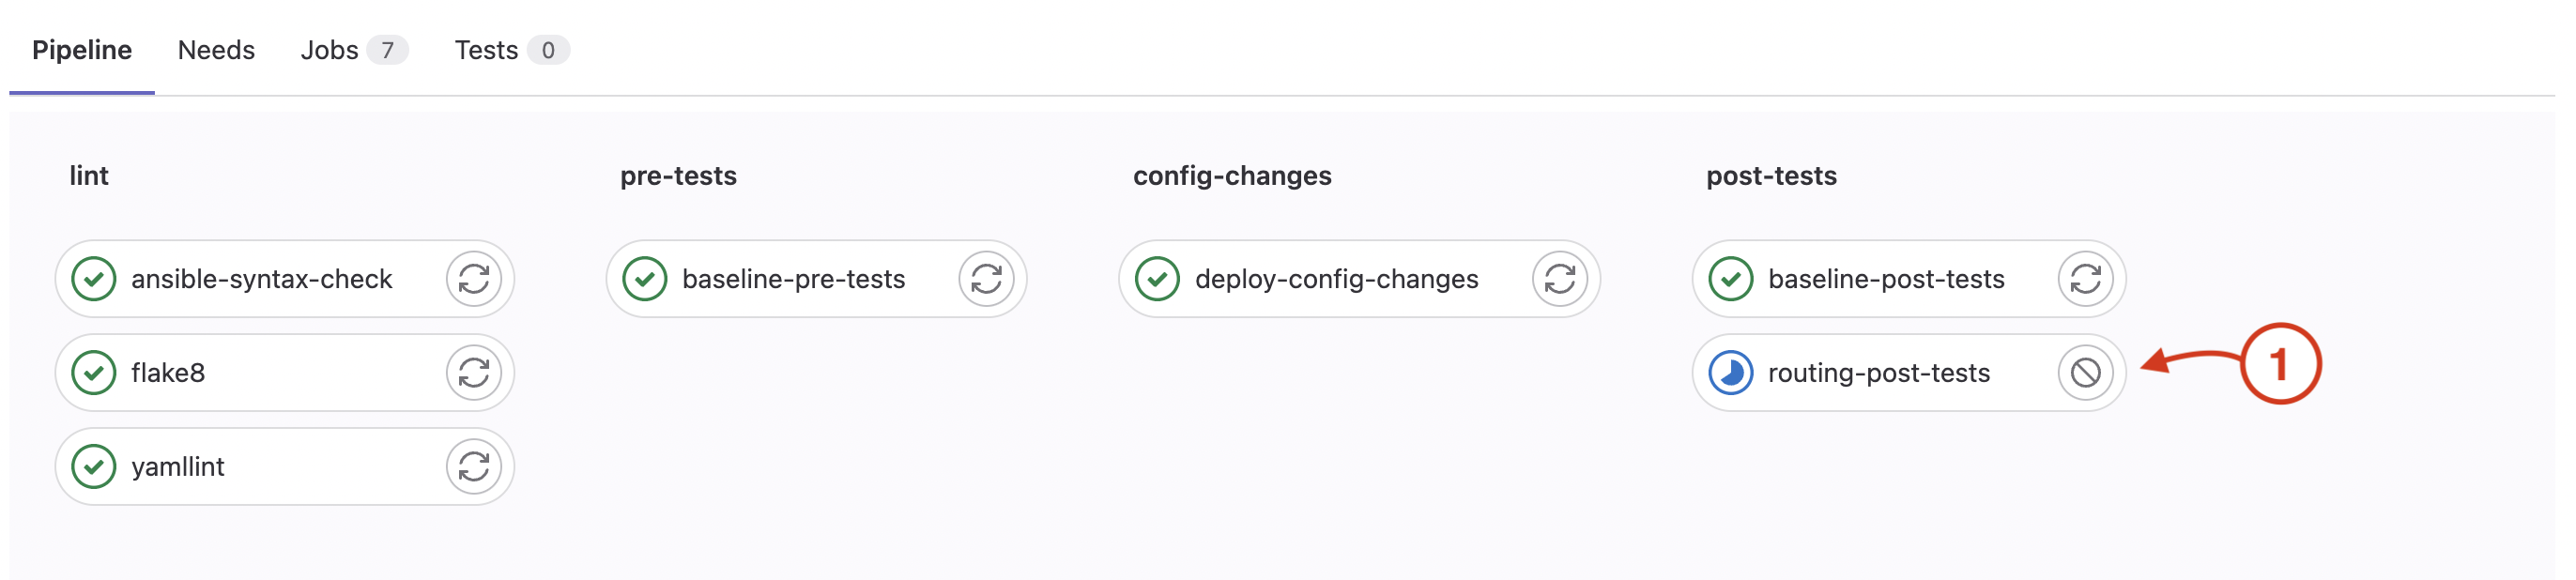
This will bring you to the job running your routing-post-tests that is using your reusable CXTM API script to drive the second batch you created in CXTM focused on routing tests. The test cases in the batch are expected to pass, thus the pipeline step stage will pass, however, if one of the batch test cases fails, then the pipeline would fail.
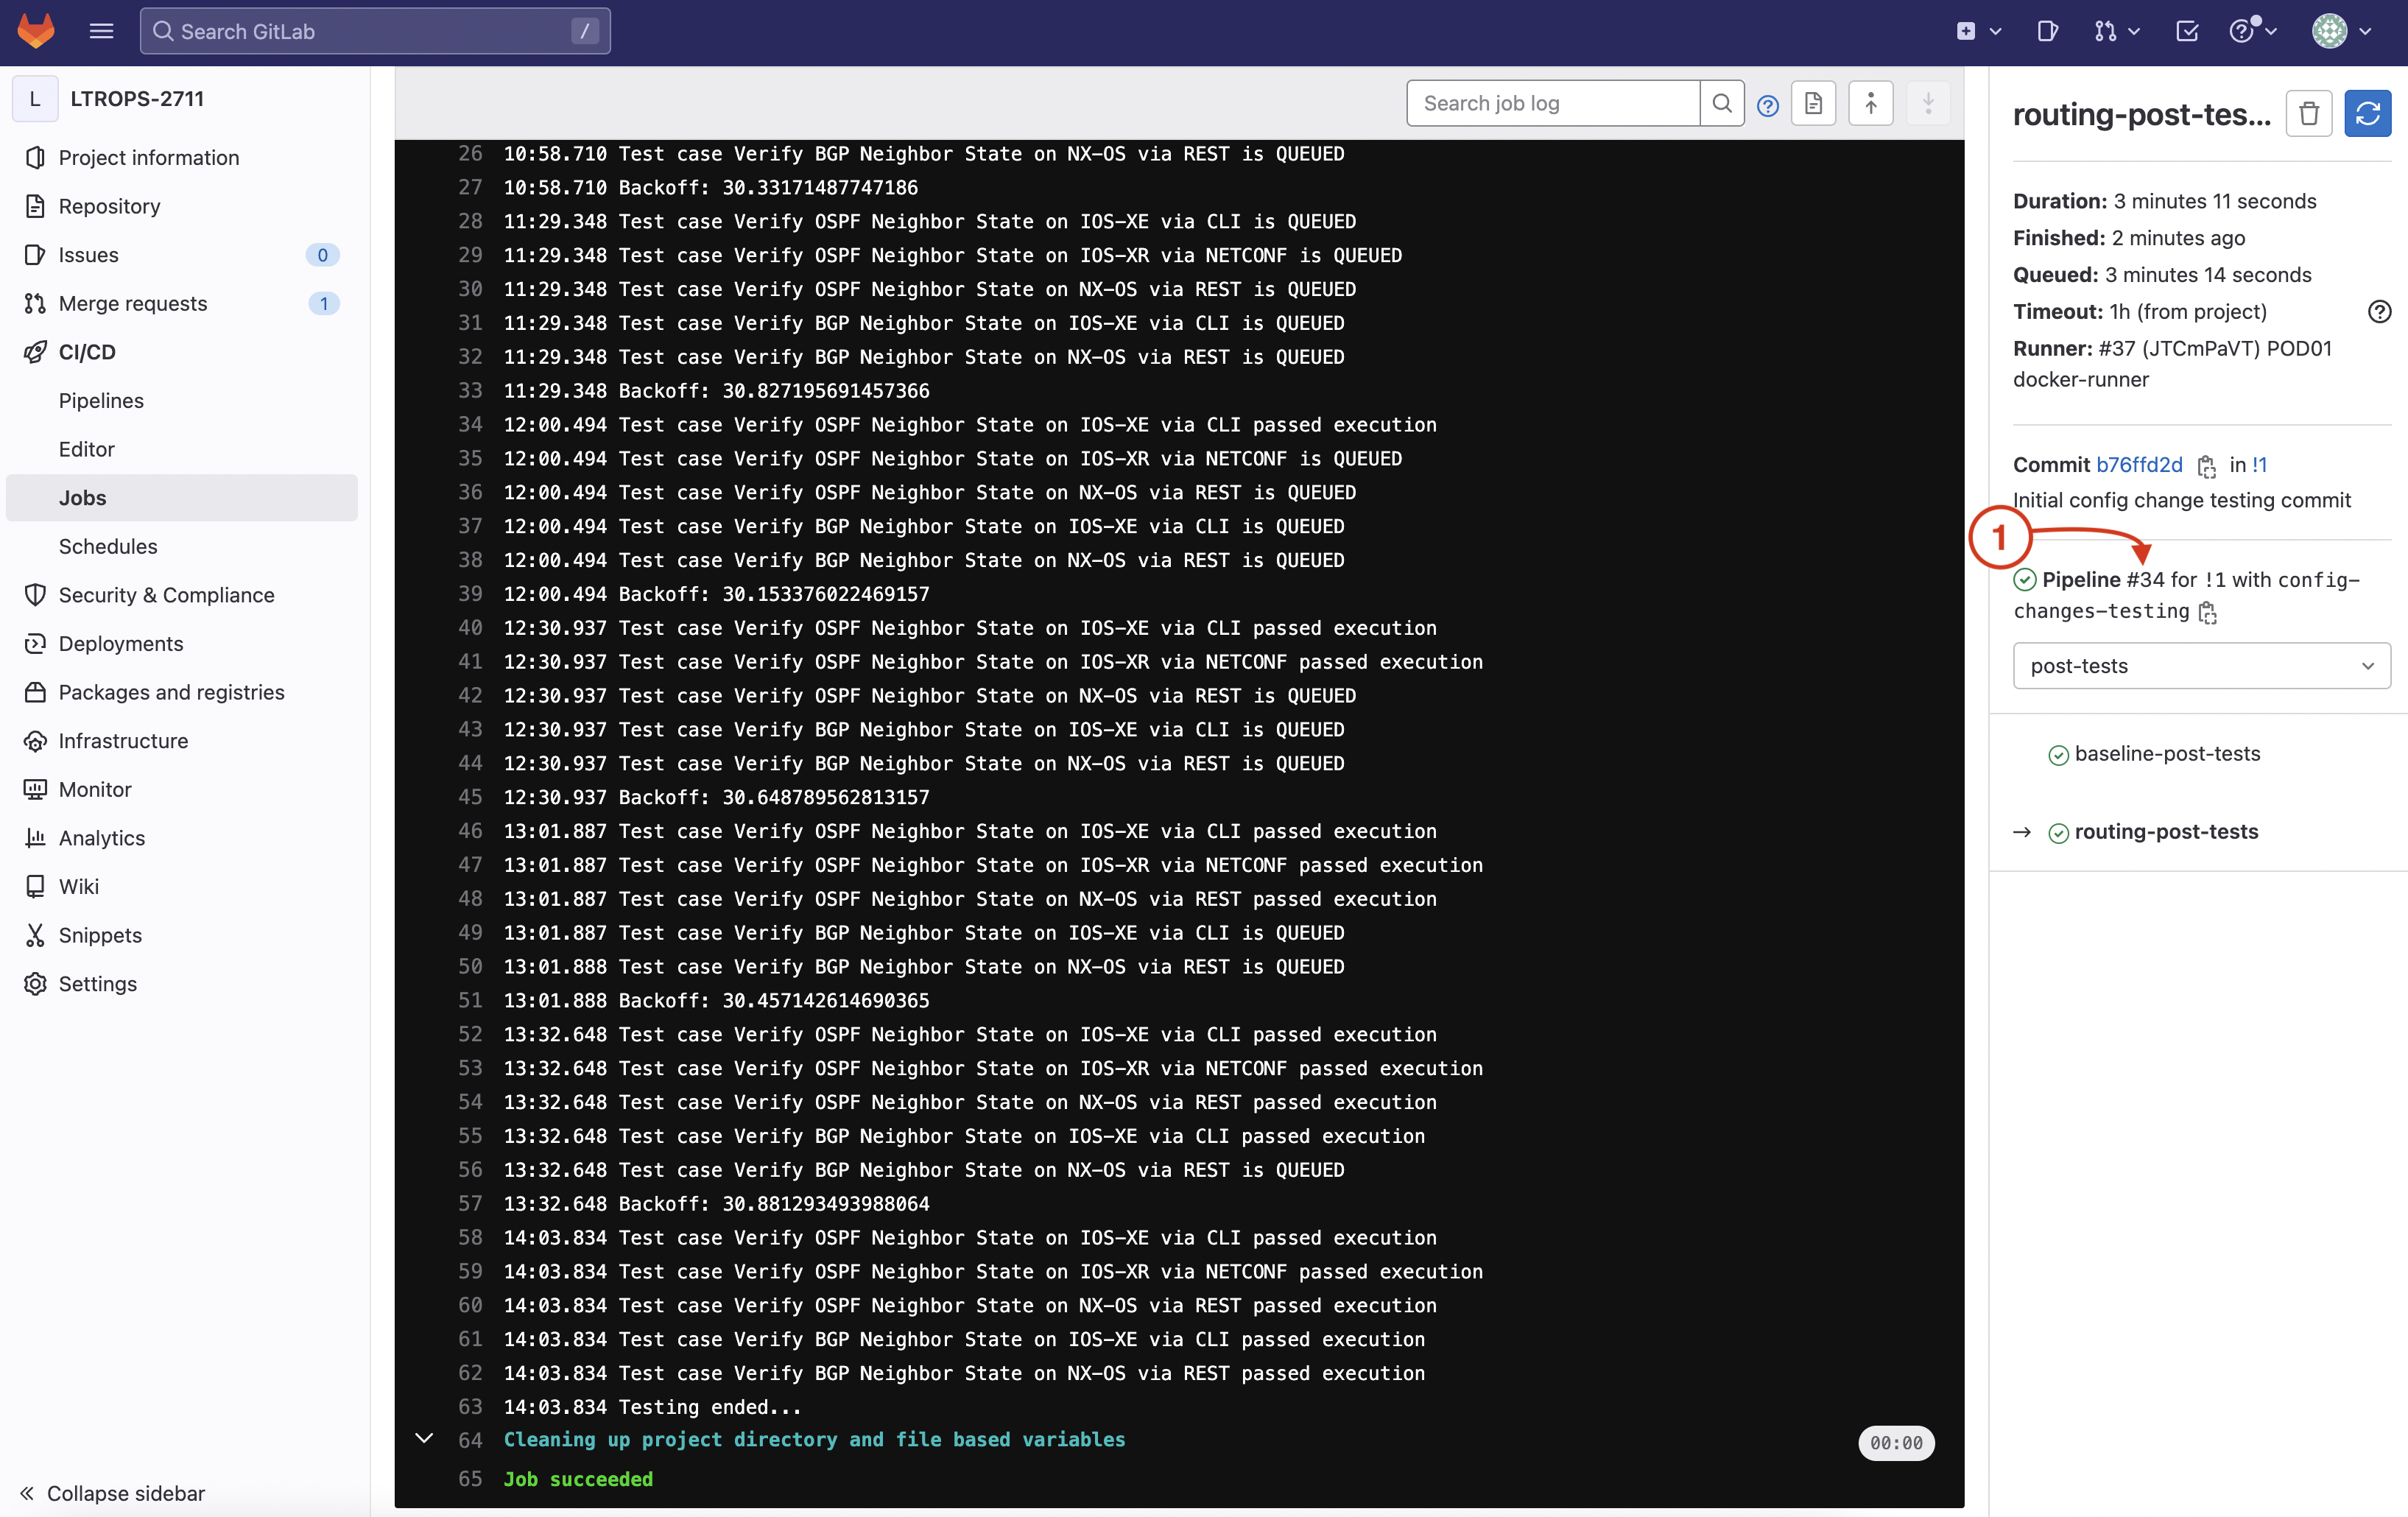
Congrats! You successfully ran your CI pipeline for your proposed configuration change and all the tests you developed passed! This configuration change is ready for your next maintenance window.
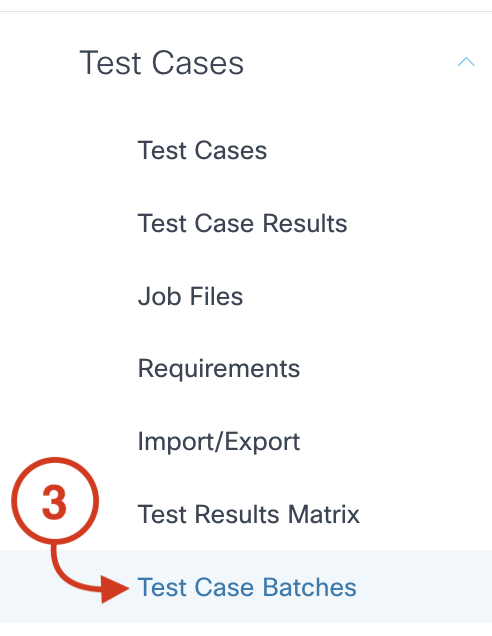
Return to your CXTM browser window
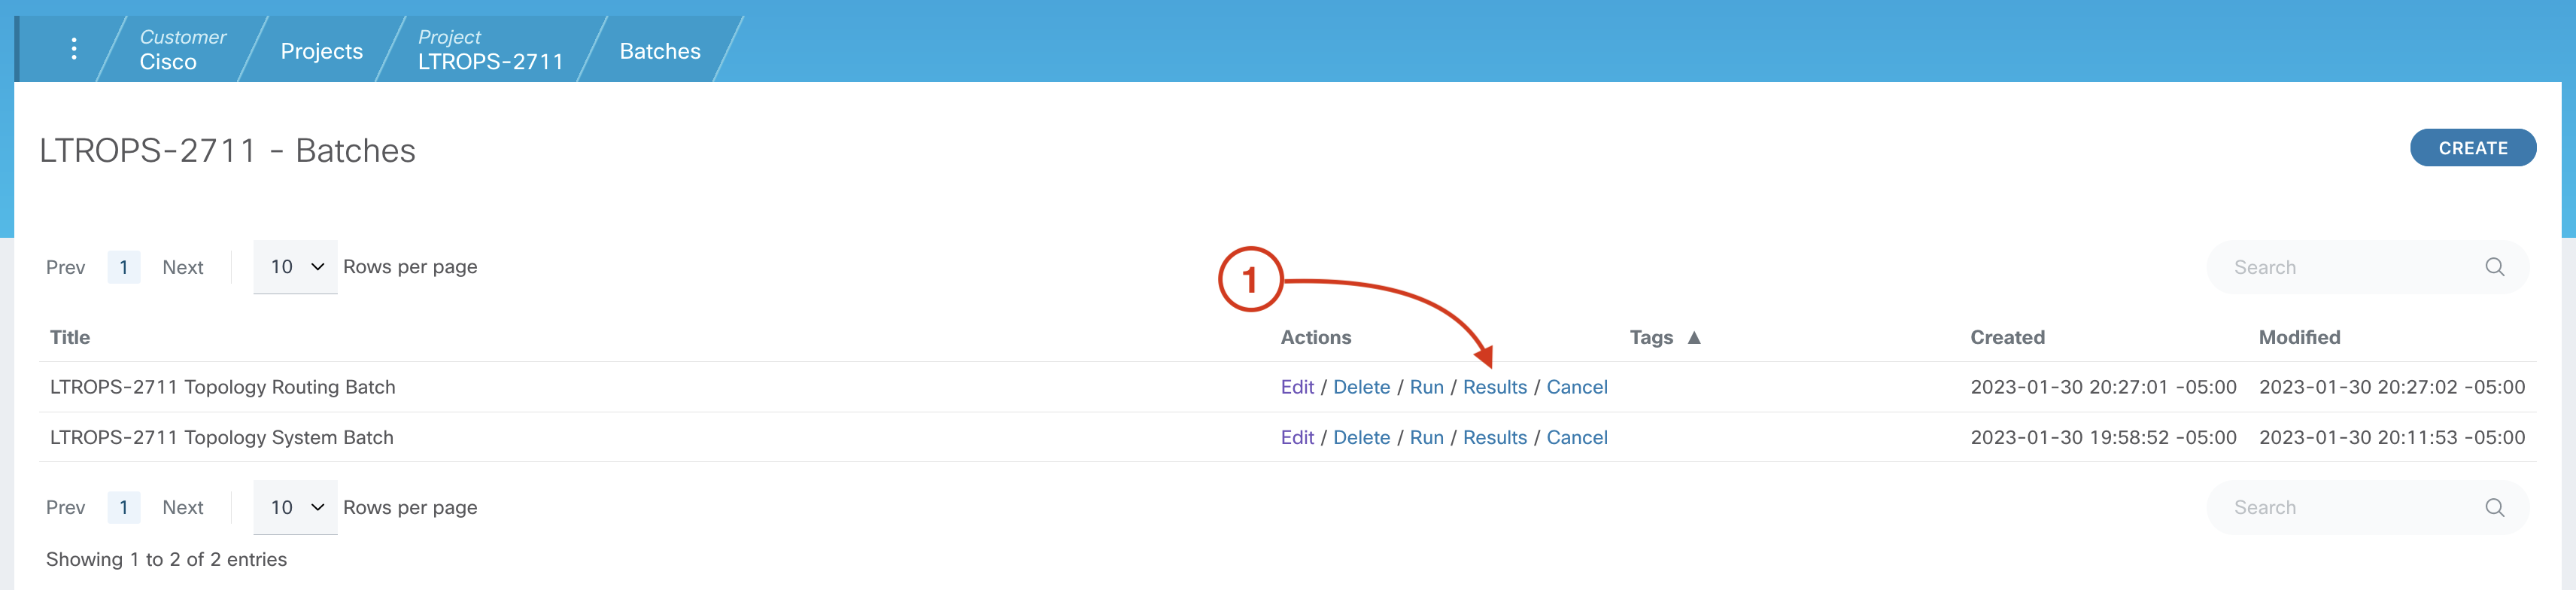
From your project's Batches page:
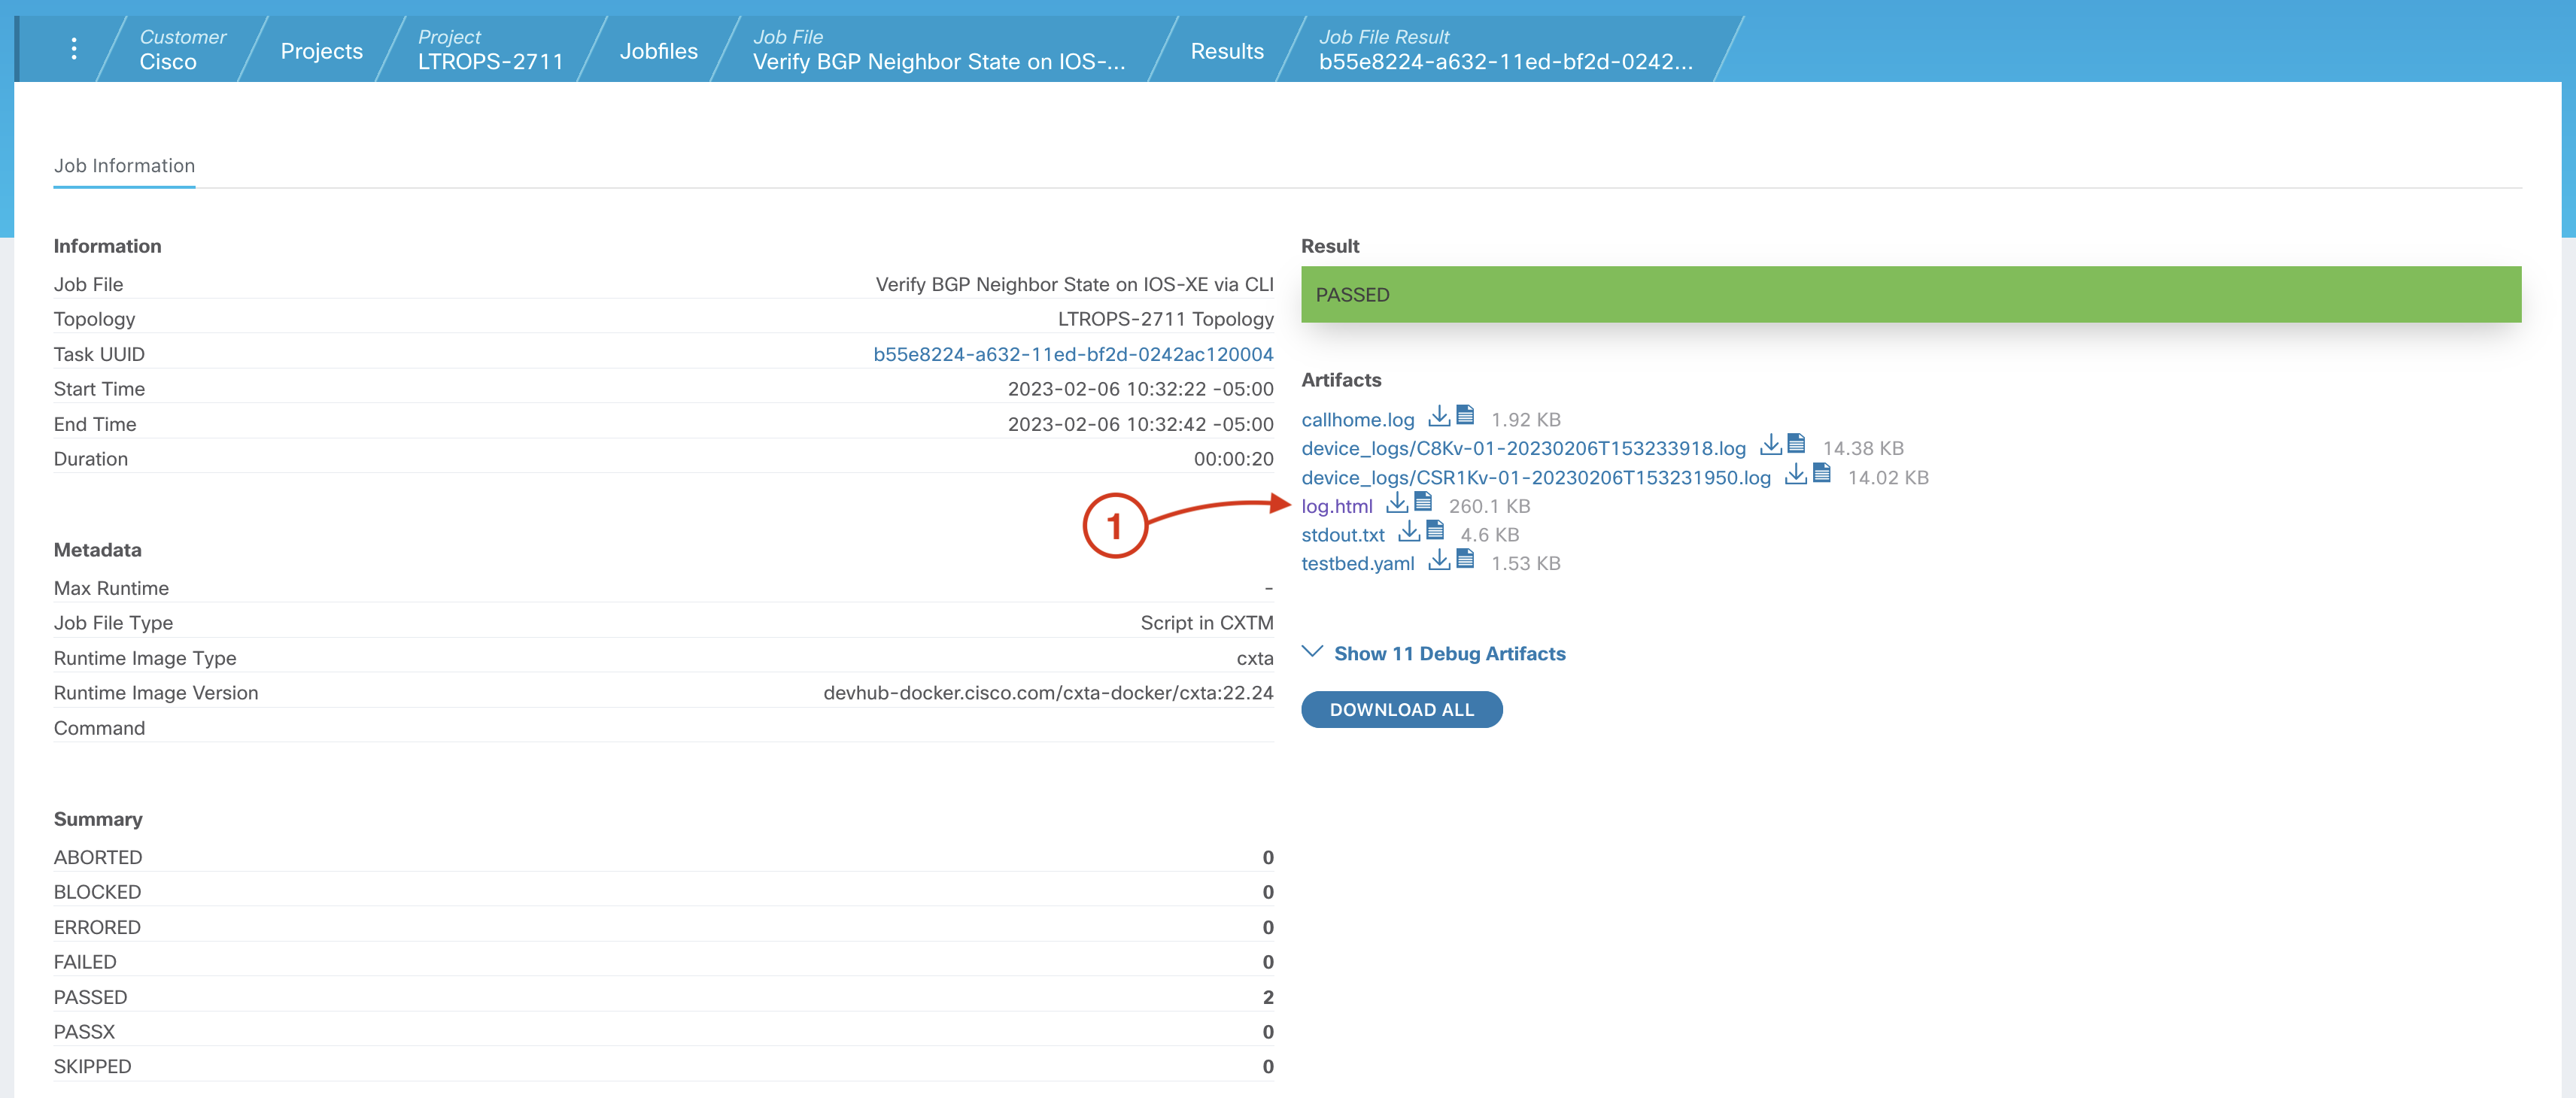
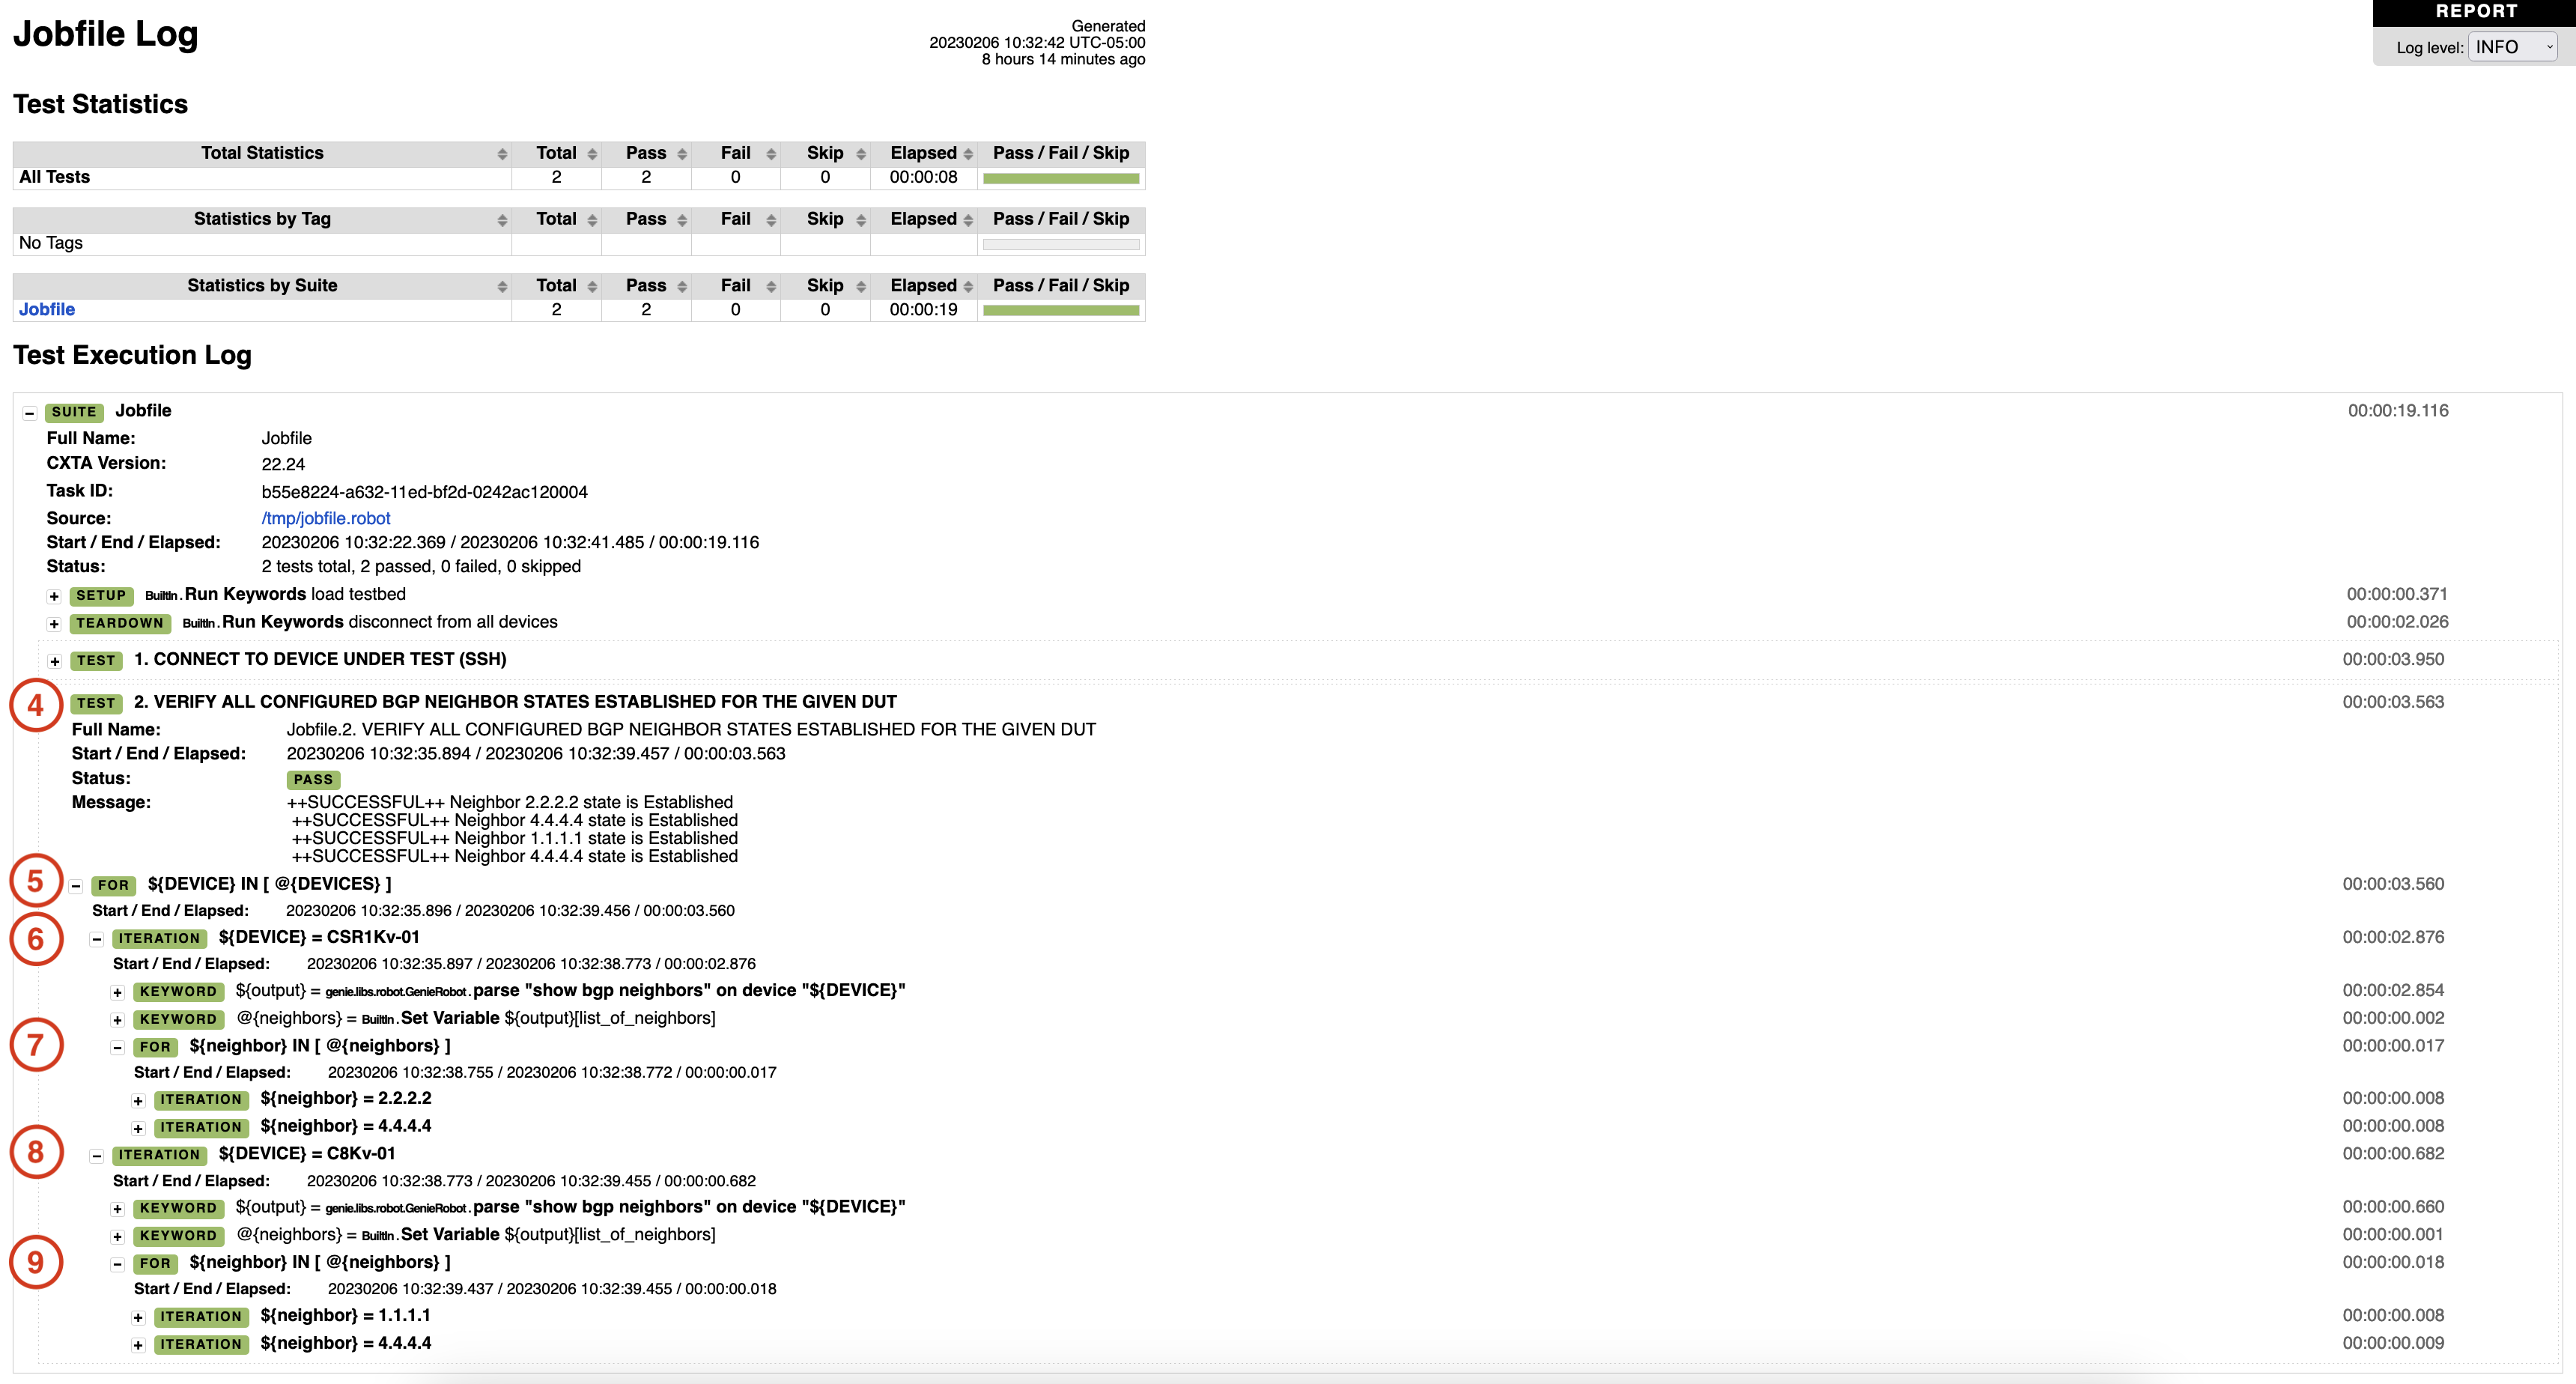
Compare this expanded output to the output you reviewed earlier after first runnng this test case in a batch. In this expanded output, notice that this test case has now iterated over both the CSR1Kv-01 and C8Kv-01 devices since you added C8Kv-01 to the DEVICES list earlier in the lab. Also, notice, now that the proposed configurations hae been pushed in the pipeline, that CSR1Kv device now has two BGP peers. It's now peered to 2.2.2.2 (the newly configured C8Kv-01), in addition to the peering to 4.4.4.4 (your N9Kv device) that was seen before.
Also notice that the C8Kv device has two BGP peers. One to 1.1.1.1 (the CSR1Kv device) and one to 4.4.4.4 (your N9Kv device).
Continue to the next section to review CXTM reporting now that your pipeline has run successfully.