- Introduction
- CXTM Basics
- CXTM Projects
- CXTM Test Cases
- CXTM Test Automation
- Revisit Imported Test Cases
- CXTM Batches
- NetDevOps
- CXTM Reporting
- CXTM References
- Bonus: Project Users
- Bonus: CXTM REST API
Create Test Case Batches
There are multiple ways to trigger automated test cases to run individually in CXTM. Another option is to add test cases to logical
groups for batch execution.
Step 1 - Select Test Cases for the System Batch
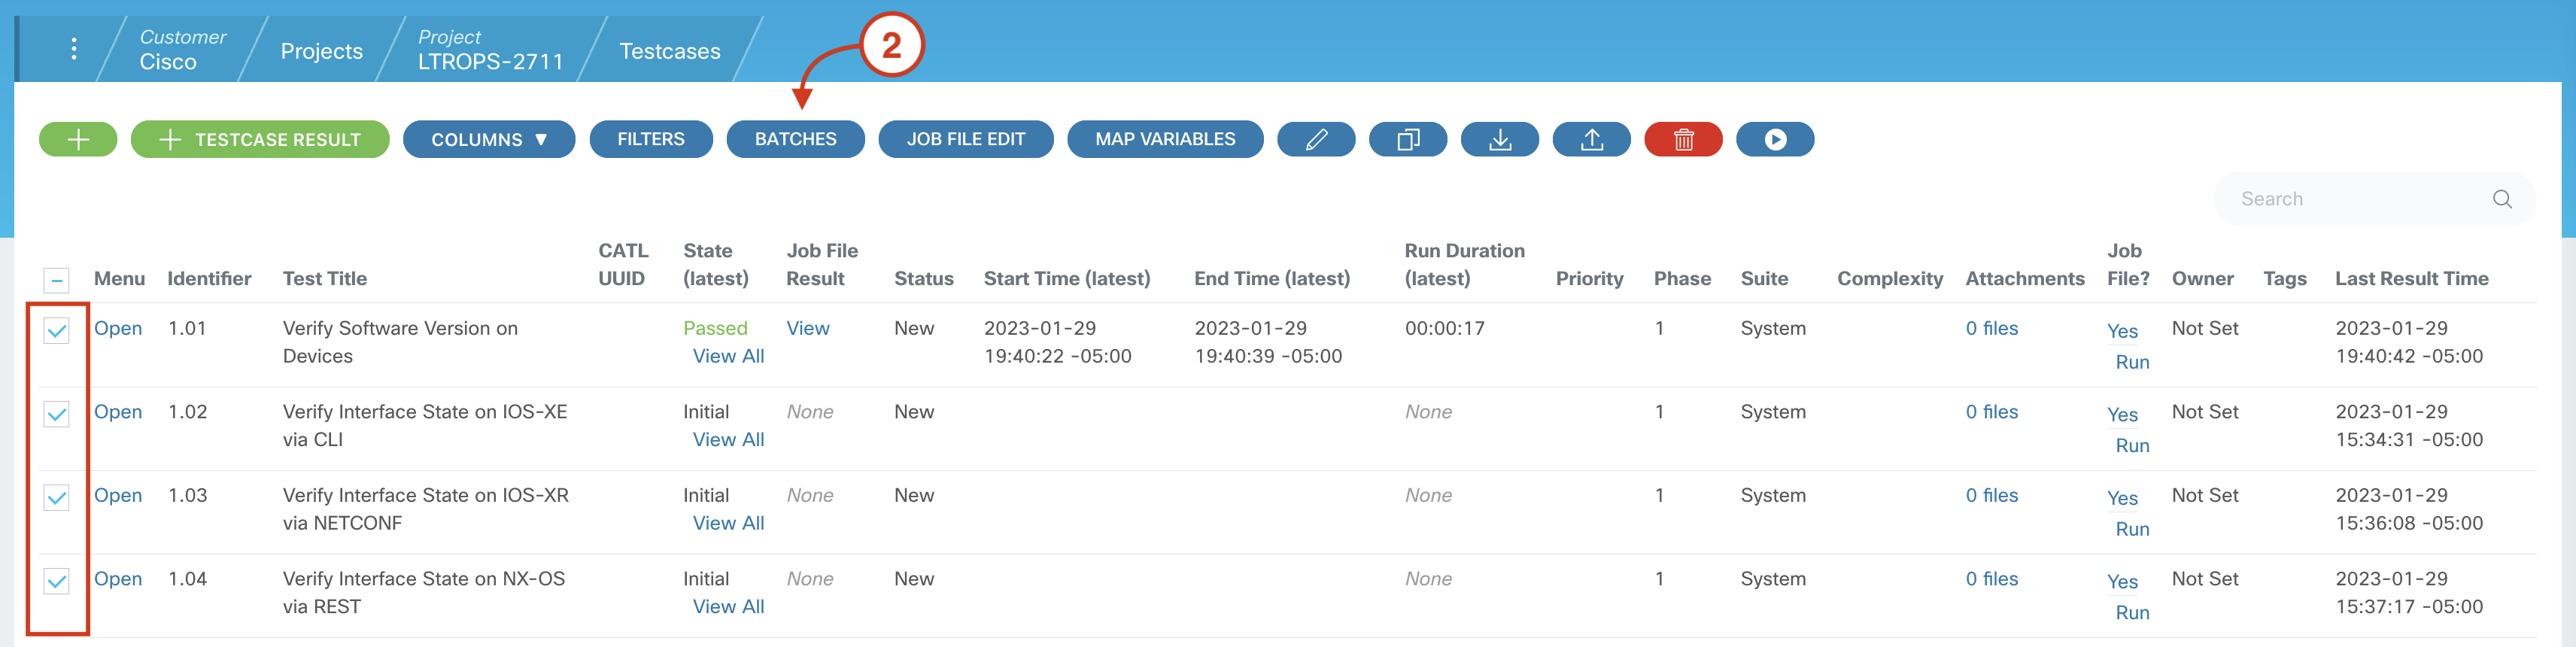
From your project's Test Cases page:
-
Click on the checkbox beside all of the Test Cases belonging to Phase 1 (with IDs 1.01 - 1.04)
-
Click the BATCHES button to launch the Testcase Batches popup
Step 2 - Confirm Batch Options
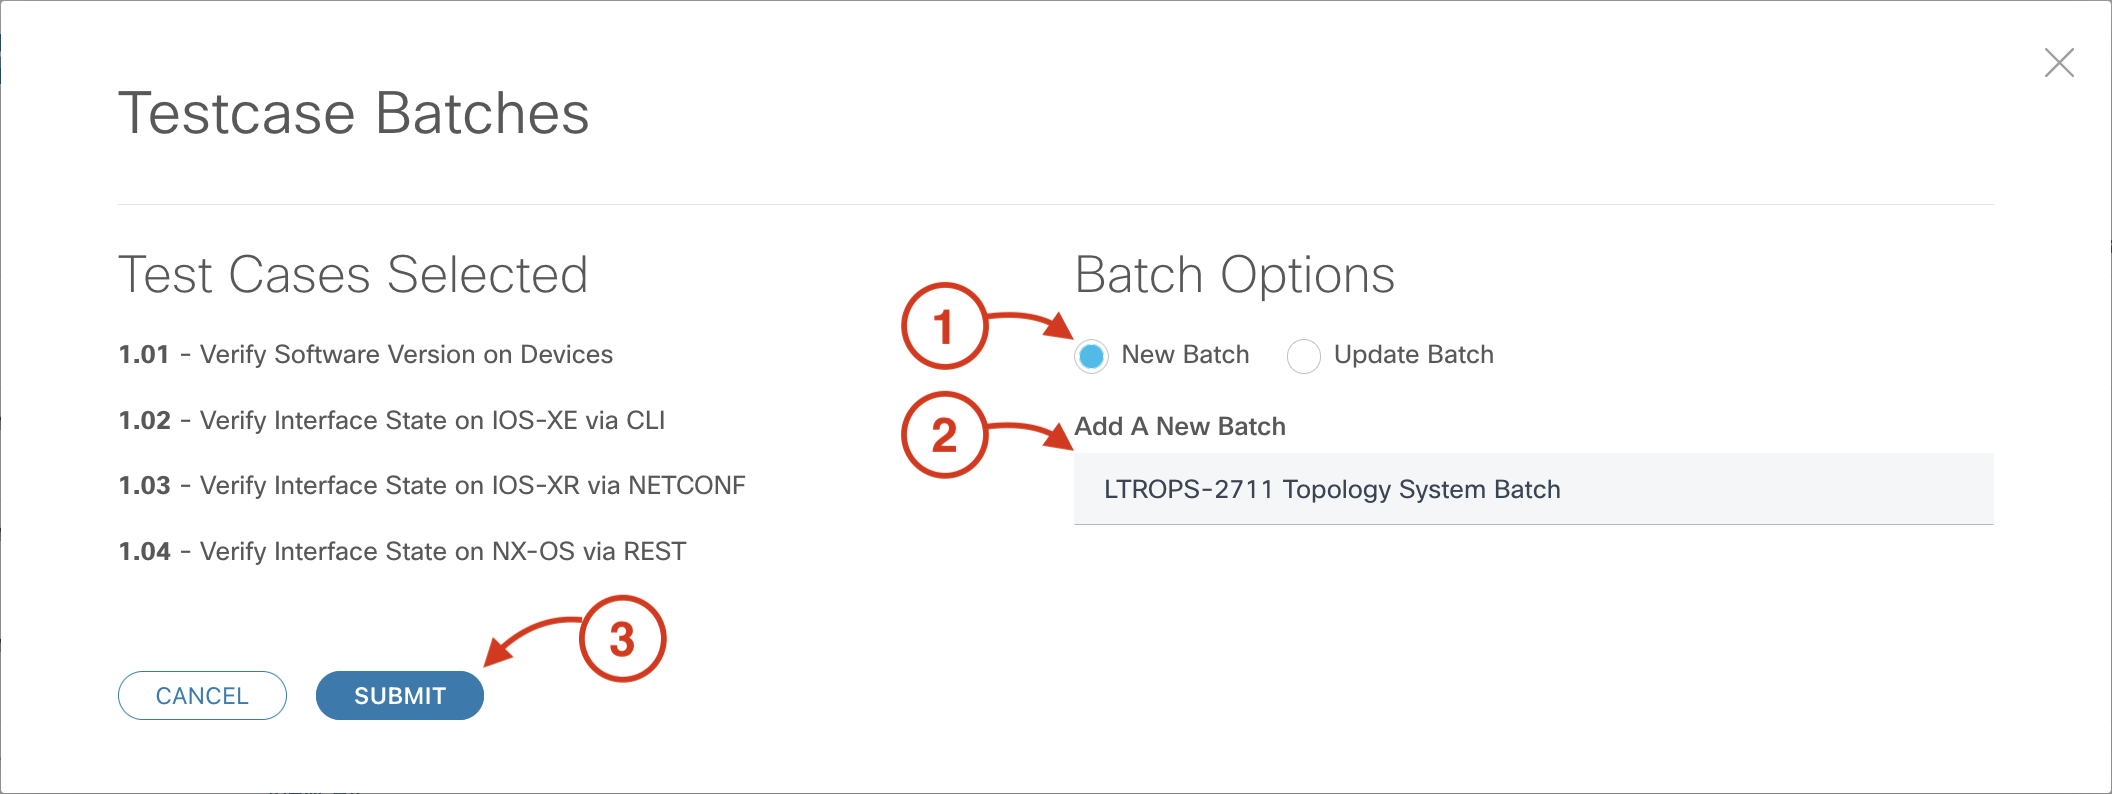
In the Testcase Batches popup, make the following selections:
-
Confirm that the New Batch radio button is selected
-
Add A New Batch:
LTROPS-2711 Topology System Batch
-
Click SUBMIT
Step 3 - Save the Batch
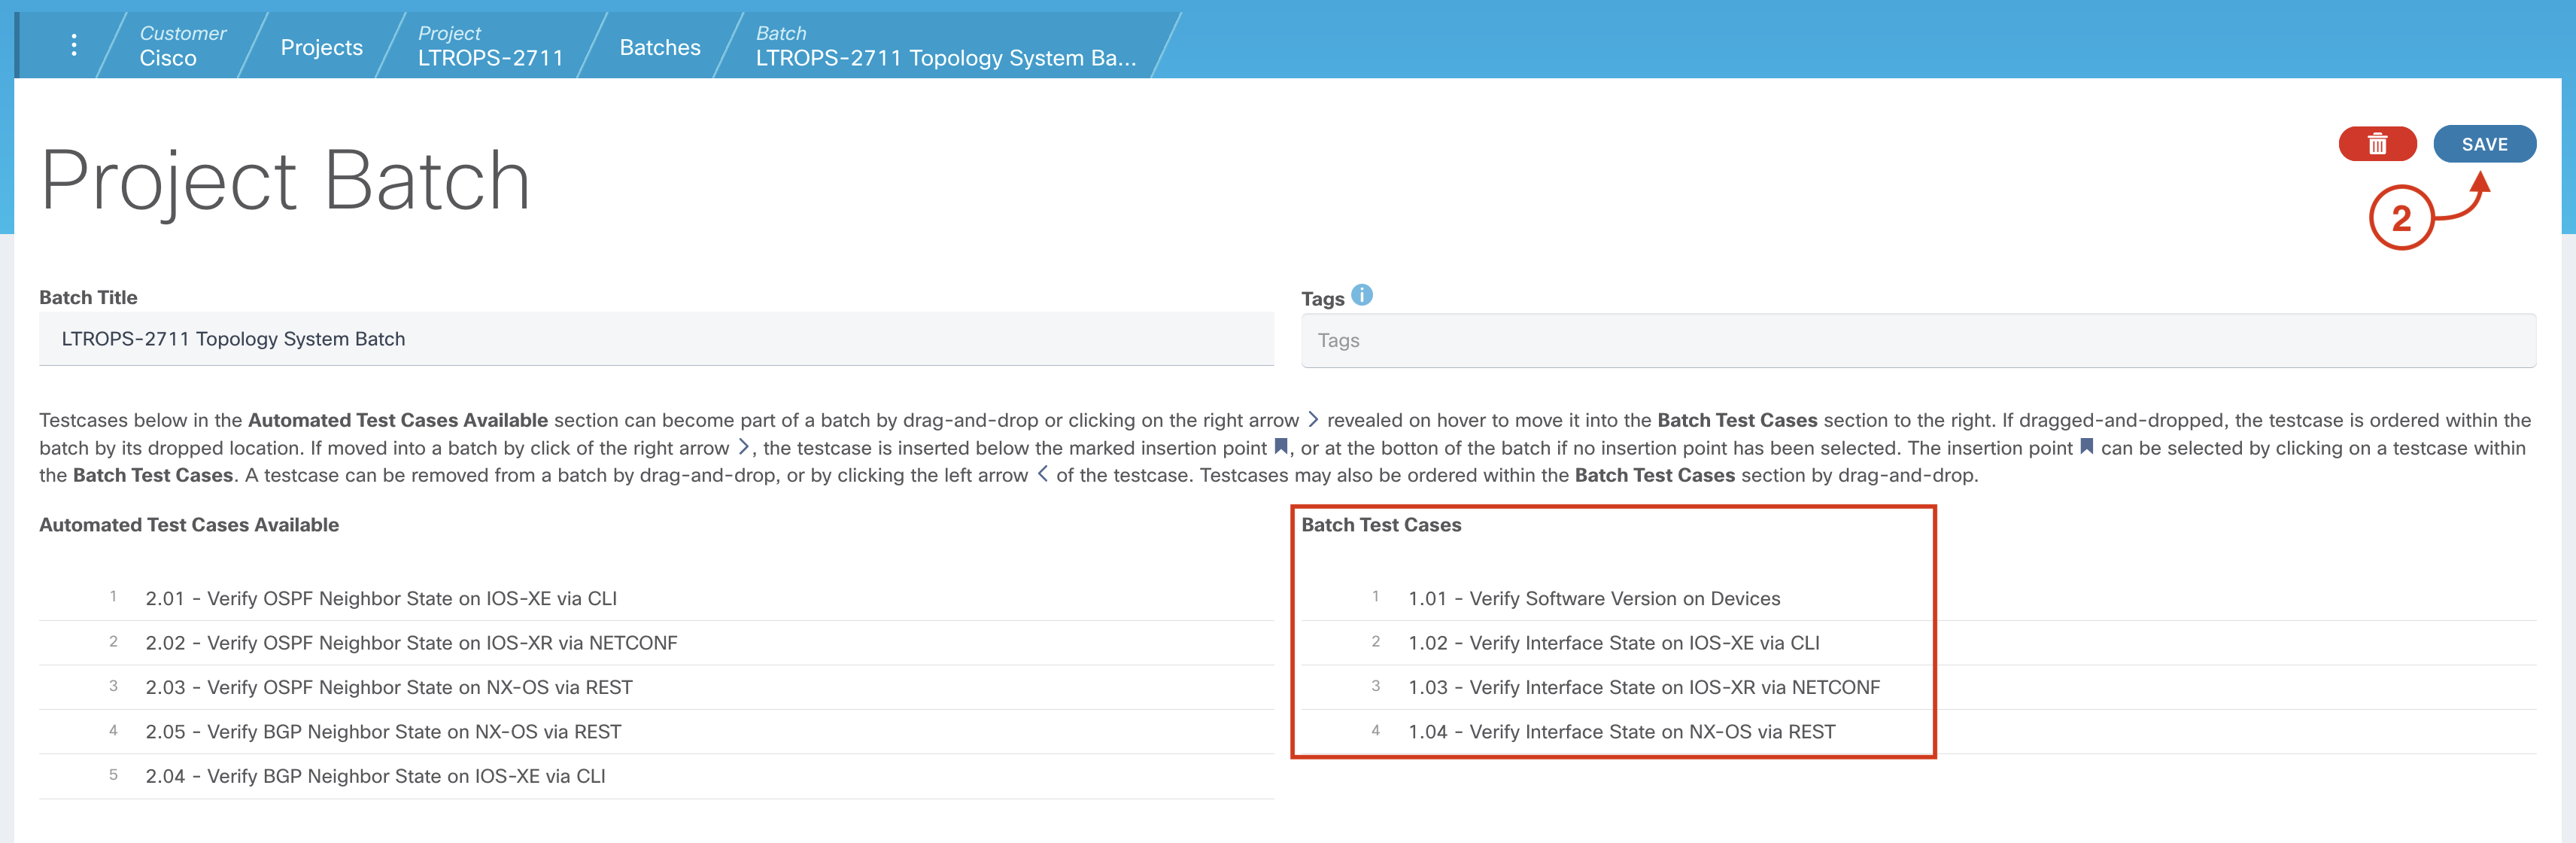
From the Project Batch page for LTROPS-2711 Topology System Batch:
-
Confirm that the four Phase 1 test cases appear under Batch Test Cases
-
Click the SAVE button
Step 4 - Return to Test Cases Page
From your project's Batches page:
-
Navigate back to your project home by clicking on the Project LTROPS-2711 tab in the navigation
breadcrumbs.

-
Click on VIEW TEST CASES

Step 5 - Select Test Cases for the Routing Batch
From your project's Test Cases page:
-
Click on the checkbox beside all of the Test Cases belonging to Phase 2 (with IDs 2.01 - 2.05)
-
Click the BATCHES button to launch the Testcase Batches popup

Step 6 - Confirm Batch Options
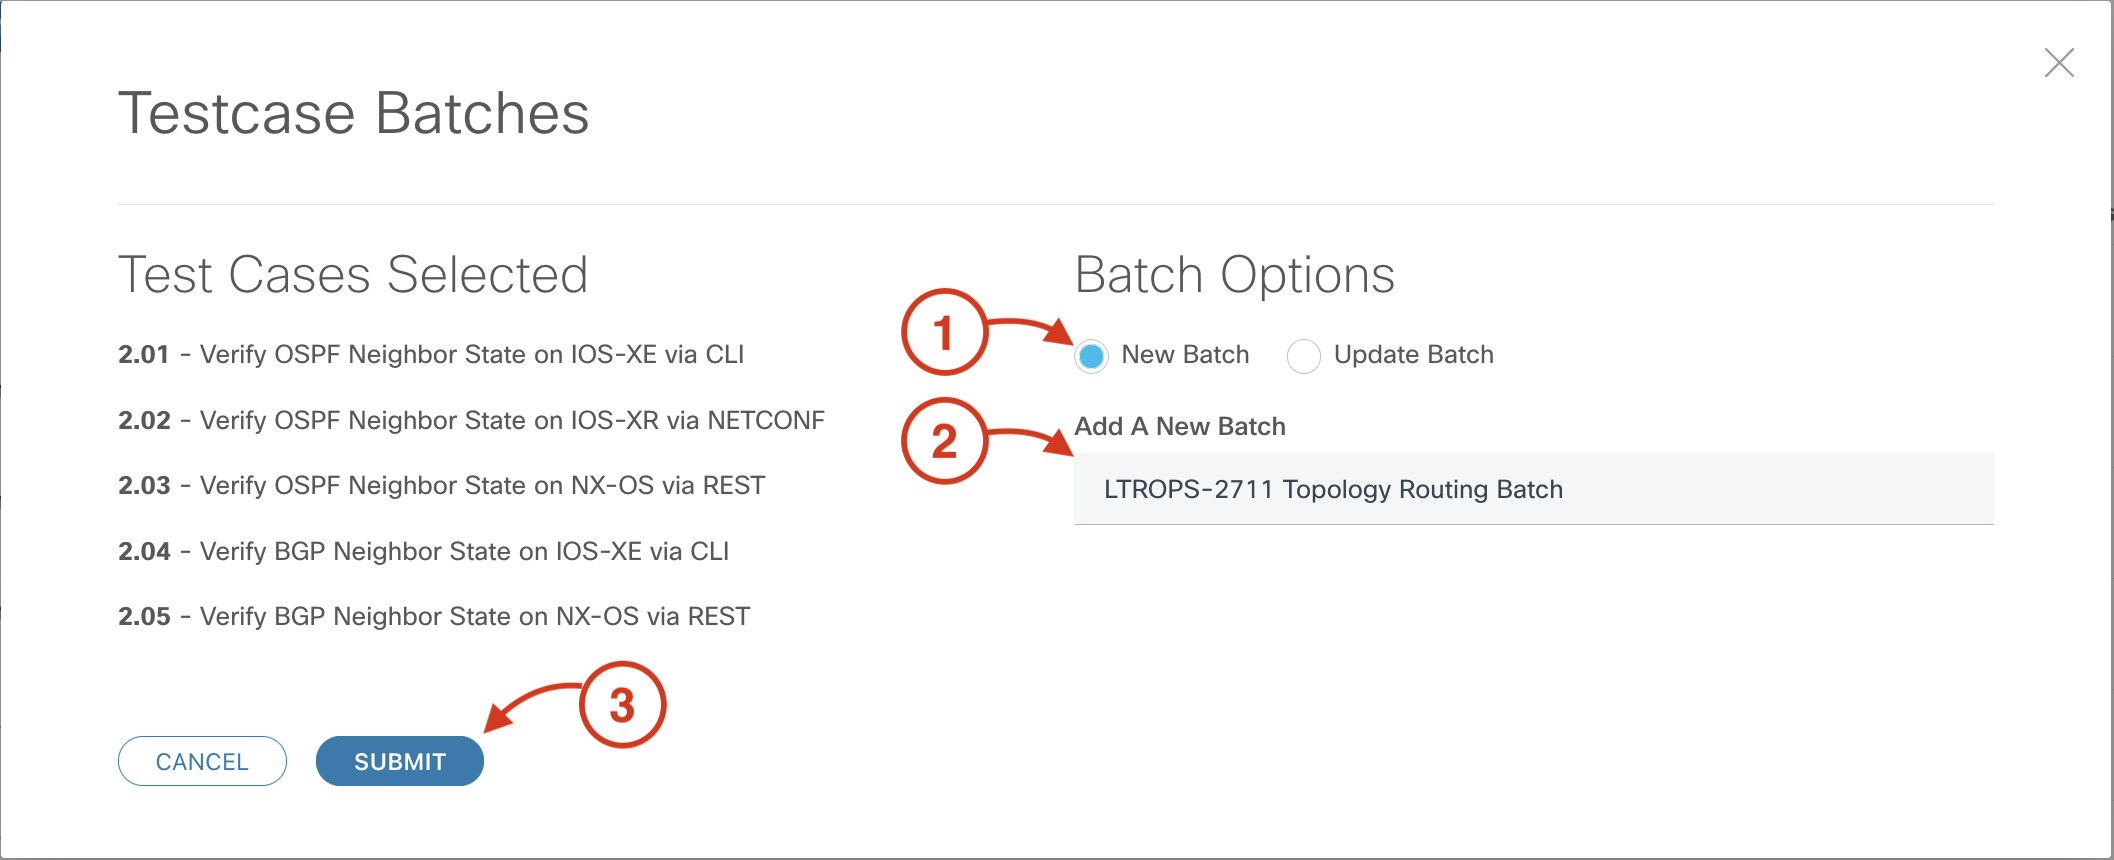
In the Testcase Batches popup, make the following selections:
-
Confirm that the New Batch radio button is selected
-
Add A New Batch:
LTROPS-2711 Topology Routing Batch
-
Click SUBMIT
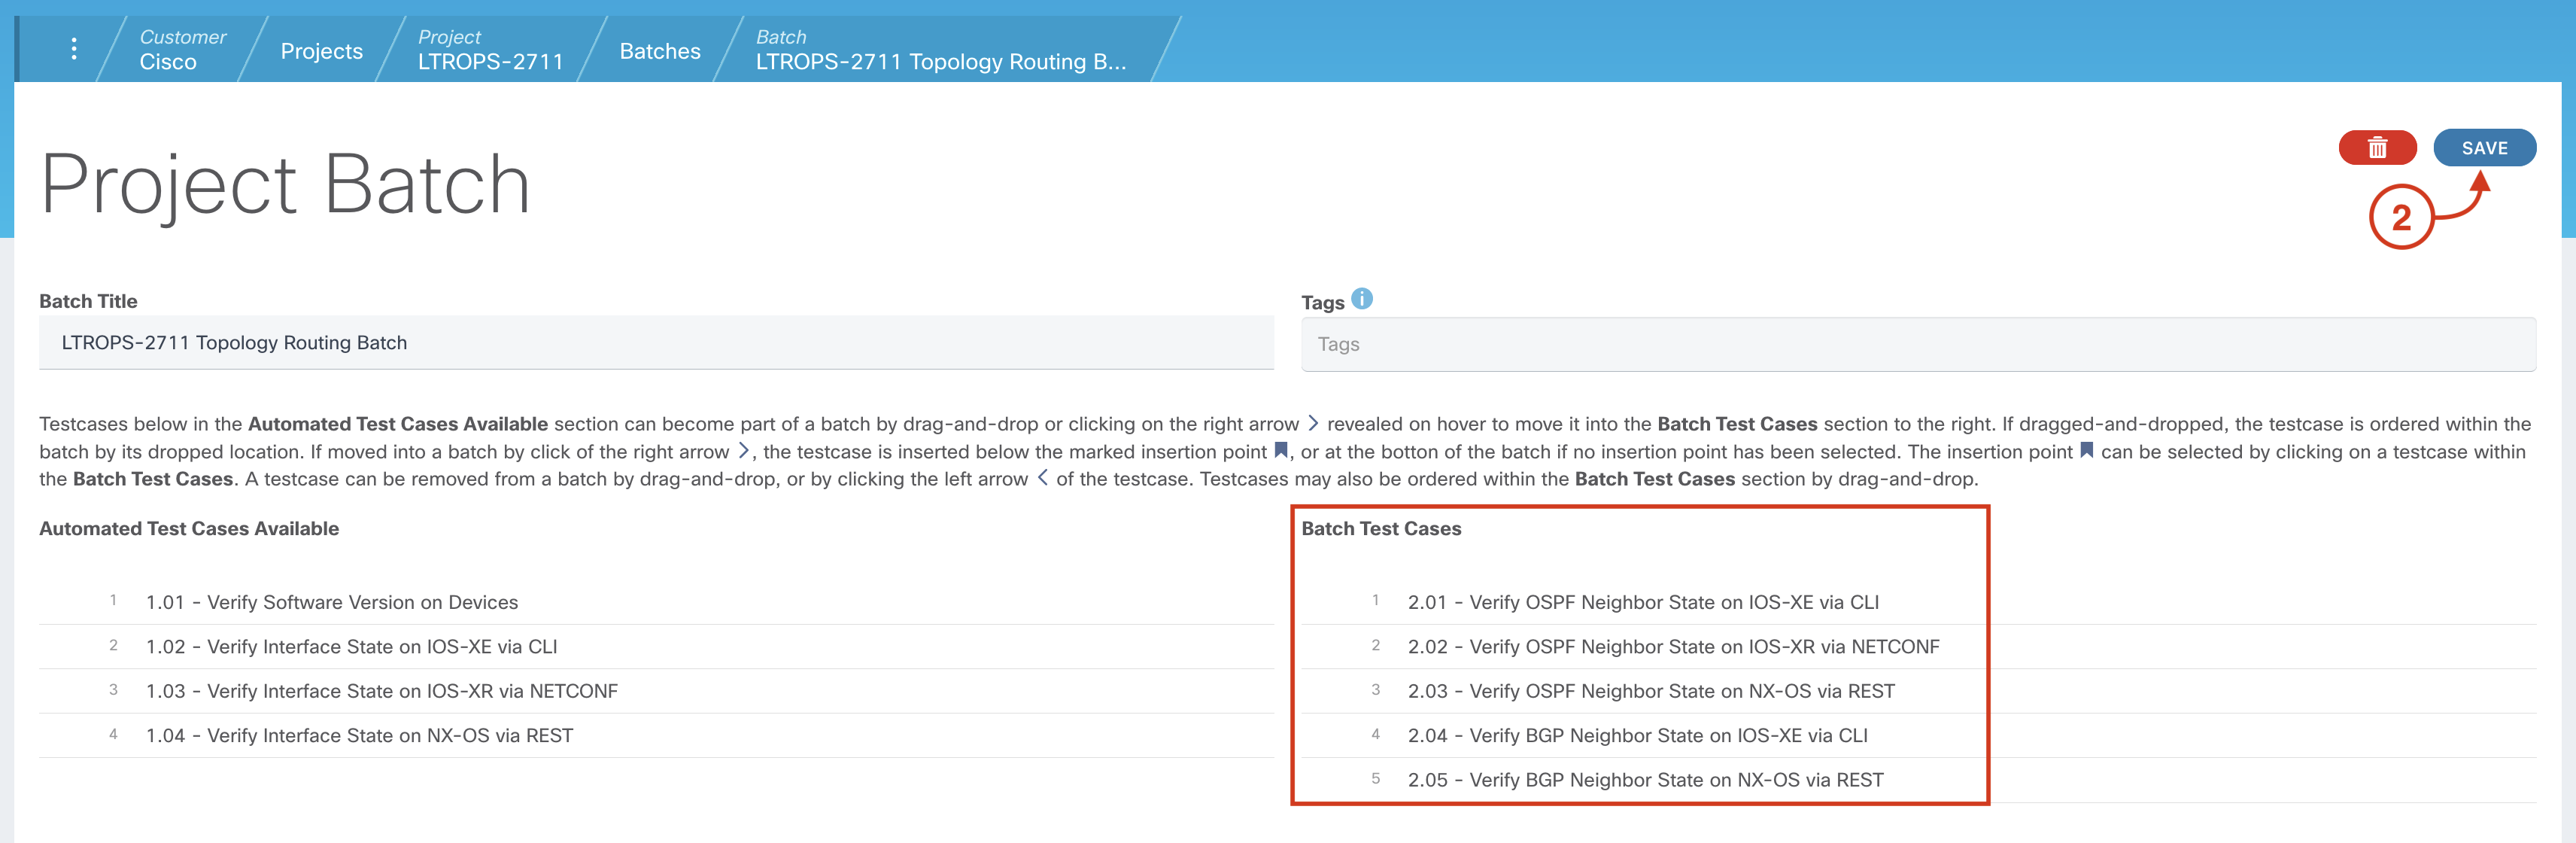
Step 7 - Save the Batch
From the Project Batch page for LTROPS-2711 Topology System Batch:
-
Confirm that the five Phase 2 test cases appear under Batch Test Cases
-
Click the SAVE button
-
Confirm that both the Routing and System Batch are configured
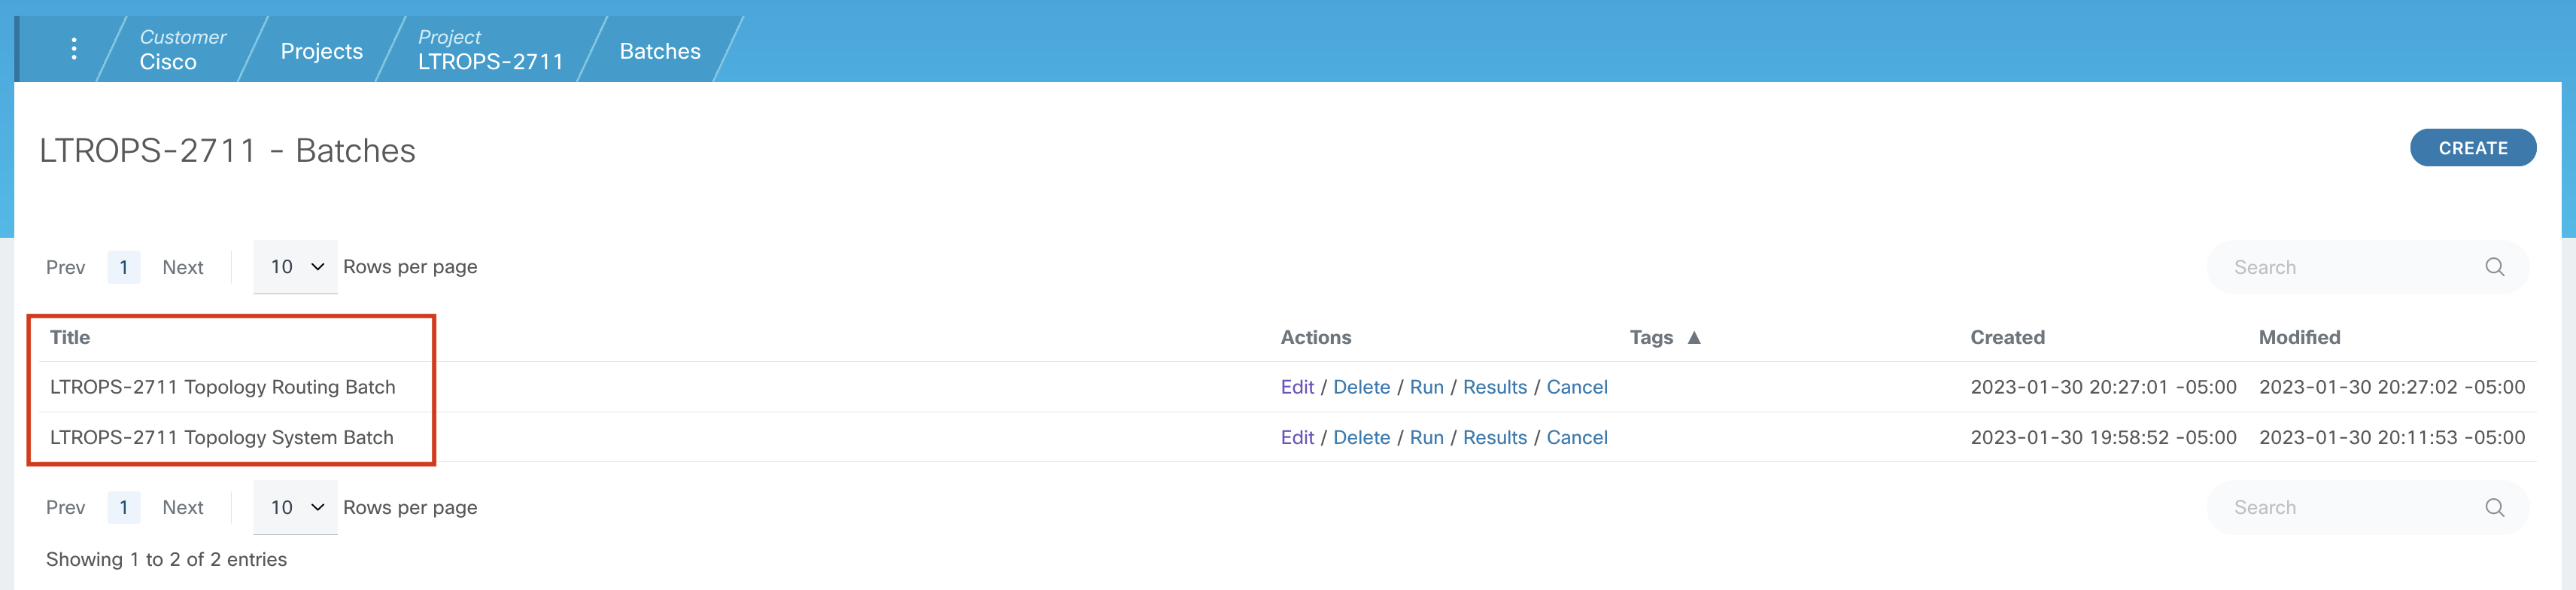
Continue to the next section to run the batches and review the results.